How to Test Your Garden Soil at Home

How to Test Your Garden Soil at Home: A Comprehensive Guide

Picture this: You’ve spent countless hours tending to your garden—planting, watering, and nurturing—but your plants just aren’t thriving. What’s the missing link? More often than not, it’s the soil. Healthy soil is the foundation for a vibrant garden, but how do you know if yours is up to par? The truth is, testing your garden soil at home is easier than you might think, and it’s essential for successful gardening.

So, why should you care about testing your soil? For starters, soil health directly influences nutrient availability, pH levels, and overall plant growth. Just like we need a balanced diet to thrive, plants require specific nutrients to flourish. By understanding the composition of your soil, you can make informed decisions that will lead to a more productive garden. Ready to dig in? Let’s explore the steps to test your garden soil from the comfort of your home!

Understanding Soil Composition: Why It Matters

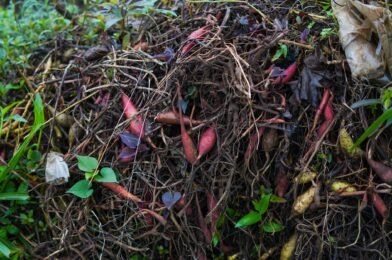
Your garden soil isn’t just dirt; it’s a complex ecosystem filled with minerals, organic matter, and microorganisms. When we talk about soil composition, we’re referring to the balance of sand, silt, and clay. Each type of soil serves a different purpose. Sandy soil drains quickly, while clay soil retains water. Loamy soil, a blend of all three, is often considered the best for gardening. To illustrate, think about your neighbor’s garden thriving in rich, loamy soil while yours, made of sandy dirt, struggles to hold moisture. Understanding your soil’s composition will empower you to make necessary amendments to improve your plants’ health.

Gathering Your Soil Samples: The Right Way

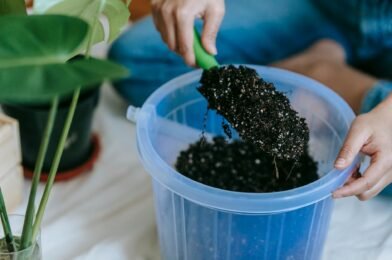
To kick off your soil testing, you’ll need to gather samples. This is a crucial step, and doing it right will yield more accurate results. Start by choosing several areas in your garden, especially where plants seem stunted or unhealthy. Using a clean garden trowel, remove the top two to three inches of soil, as this layer often contains debris and organic matter that can skew results. Instead, dig down about six inches, collect a small sample, and place it in a bucket. Repeat this process in different areas, and mix the samples well in the bucket to create a composite sample. Remember, the more thorough you are, the more reliable your results will be!

Testing pH Levels at Home: A Simple Method

pH is a crucial factor in soil health—it affects nutrient availability, microbial activity, and even plant growth. To test your soil’s pH at home, you can use a simple method with items you likely already own. Mix one part soil with one part distilled water in a clean container, then stir in a tablespoon of baking soda. If it fizzes, your soil is acidic (below 7 pH). If it doesn’t sizzle, repeat the process with vinegar; if it fizzes, your soil is alkaline (above 7 pH). Here’s the thing: most garden plants prefer a pH between 6.0 and 7.5 for optimal growth. Knowing your soil’s pH will guide you in making appropriate adjustments.

Examining Nutrient Levels: The DIY Soil Test Kit

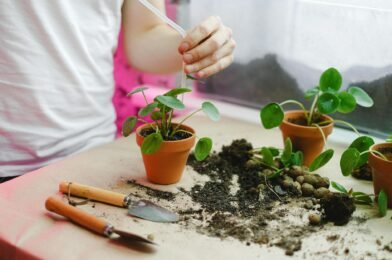
If you’re keen to delve deeper into your soil’s nutritional profile, investing in a DIY soil test kit is a smart move. These kits often include tests for nitrogen, phosphorus, and potassium—the three main nutrients crucial for plant growth. Follow the instructions to mix your soil sample with the testing solutions provided in the kit. For example, when I first tested my garden soil, I was shocked to find that it lacked potassium, leading to stunted plant growth. By adding the right nutrients, I was able to transform my garden into a lush paradise!

Amending Your Soil: The Next Steps

Once you have the results from your tests, it’s time to take action. If your soil is too acidic, you may need to add lime to raise the pH. Conversely, if it’s too alkaline, sulfur could help lower it. For nutrient deficiencies, organic fertilizers like compost or well-rotted manure can be game-changers. What most people miss is that improving soil health is not an overnight process—consistency is key. Regular testing and amendments over time will yield the best results. After all, a thriving garden doesn’t just happen; it’s cultivated with care!

When to Test Your Soil: Timing is Key

Knowing when to test your garden soil is just as important as how to test it. Ideally, testing should be done once a year, preferably in the spring or fall when the soil is neither too wet nor too dry. This timing allows you to address any deficiencies before planting season begins. I remember one year, I tested in the late summer, only to realize my soil needed significant amendments before I could plant my fall crops. Don’t make the same mistake—plan your soil testing wisely to optimize your garden’s potential!

Sharing Your Findings: Community Matters

After testing and amending your soil, why not share your findings with fellow gardening enthusiasts? Whether it’s at a local gardening club, on social media, or even in an online forum, sharing your experiences can help others learn from your journey. For instance, when I shared my story about transforming poor soil into a thriving garden, I received an outpouring of advice and tips that enriched my gardening knowledge. Plus, helping others fosters a sense of community that can enhance your own gardening pursuits.

Your garden soil is more than just a growing medium; it is a living entity that requires attention and care. By testing your soil at home, you empower yourself to create the best environment for your plants. What’s stopping you? Grab your tools, gather your samples, and embark on the journey toward a healthier garden today! Have you tested your soil before? What were your findings? Share your thoughts in the comments below!

The Best Natural Fertilizers for a Thriving Garden

The Best Natural Fertilizers for a Thriving Garden

Have you ever wondered how some gardens seem to flourish effortlessly, bursting with vibrant colors and healthy plants? The secret often lies beneath the surface, in the soil itself. Natural fertilizers are key to promoting growth, enriching the earth, and creating an environment where plants can thrive. But which ones should you choose? Let’s explore the best options available for cultivating a garden that not only looks good but also feels good.

Truth is, many gardeners overlook the power of natural fertilizers, opting for chemical alternatives without considering their long-term impacts. These synthetic options can deplete soil health over time, while natural fertilizers enrich it. Here’s the thing: using organic solutions not only supports a healthier ecosystem but also increases the quality of your harvest. If you’re ready to dig into the world of natural fertilizers, let’s take a closer look at some top contenders for your garden.

Compost: The King of Soil Amendments

Compost is often referred to as “black gold” for a reason. This rich, organic matter is a powerhouse of nutrients that can dramatically improve soil structure and fertility. Made from decomposed kitchen scraps, yard waste, and other organic materials, compost provides a balanced diet for your plants. Did you know that compost also helps retain moisture in the soil? It creates a sponge-like effect that holds water, allowing your plants to thrive even during dry spells.

For instance, a neighbor of mine transformed her struggling vegetable garden by adding homemade compost. After just a few weeks, her tomatoes and cucumbers began to flourish, producing more than she had ever anticipated. If you want to start your compost pile, all it takes are a few kitchen scraps, some dried leaves, and a bit of patience. Turn that waste into nourishment, and watch your plants prosper!

Manure: A Traditional Garden Secret

While it might not sound glamorous, manure has been a gardener’s ally for centuries. Whether it’s cow, chicken, or horse manure, this natural fertilizer is rich in essential nutrients like nitrogen, phosphorus, and potassium. Manure not only feeds your plants but also enhances soil structure, making it more aerated and easier to work with. The key is to ensure it’s well-aged or composted before application to avoid burning your plants.

Consider a local farm that offers free or low-cost manure to community members. By utilizing this resource, gardeners can significantly reduce their fertilizer costs while providing their soil with a nutrient-rich boost. Imagine nurturing your plants with the very same natural fertilizer that has been used for generations. Does this not connect you to a larger tradition of sustainable gardening?

Bone Meal: A Nutrient-Rich Phosphorus Source

For those looking to boost root development and flowering, bone meal is a fantastic choice. This organic fertilizer is made from crushed animal bones and is rich in phosphorus, which is crucial for healthy plant growth. It’s especially beneficial for flowering plants and bulbs, ensuring they have the nutrients necessary to produce stunning blooms.

Recently, I learned about a gardener who was struggling with her perennial flowers. After incorporating bone meal into her soil mix, she noticed a remarkable difference. Her plants not only bloomed abundantly but also grew more robust and resilient. If you’re eager to improve flowering performance in your garden, consider adding bone meal to your planting routine. It’s a simple yet effective way to enhance the beauty of your space.

Fish Emulsion: A Liquid Gold for Quick Nutrient Delivery

When you think of fertilizing your garden, consider the power of fish emulsion. This liquid fertilizer, derived from fish byproducts, is packed with nutrients and is rapidly absorbed by plants. It’s particularly helpful during the growing season when your plants are in desperate need of nourishment. Fish emulsion not only stimulates growth but also improves overall plant health.

A good friend of mine swears by fish emulsion for her indoor plants. After switching from traditional fertilizers, she noticed her plants were more vibrant and produced more leaves than ever before. The rich aroma might take getting used to, but the results speak for themselves. Why not give this natural option a try? You may find that your plants respond with renewed vigor.

Wood Ash: A Potassium-Rich Boost

Don’t toss out those leftover ashes from your fireplace! Wood ash is an underrated natural fertilizer that provides potassium and lime, which can enhance plant growth and improve soil pH for certain crops. However, it’s essential to use ash sparingly, as too much can create an alkaline environment that may negatively affect some plants.

Consider this: a local community garden utilized wood ash collected from its members’ homes to fertilize their crops. The results were astounding. They saw a noticeable increase in the yield of beans and tomatoes, proving that even the simplest ingredients can lead to significant benefits. Are you ready to turn what would be waste into a valuable resource for your garden?

Final Thoughts on Natural Fertilizers

So, what are your favorite natural fertilizers to use? Have you experienced any remarkable transformations in your garden? Share your thoughts below or spread the knowledge by sharing this article with fellow gardening enthusiasts!

Composting 101: Turn Kitchen Scraps Into Black Gold

Composting 101: Turn Kitchen Scraps Into Black Gold

Have you ever wondered what happens to your kitchen scraps when you throw them away? Most people don’t give it a second thought, yet nearly 30% of what we toss could be transformed into nutrient-rich compost instead of heading straight to a landfill. Imagine taking your fruit peels, coffee grounds, and vegetable trimmings and turning them into “black gold” for your garden. Composting isn’t just a trend—it’s a sustainable practice that can enrich your soil and reduce your environmental footprint.

Truth is, composting is surprisingly easy. You don’t need a degree in horticulture or a vast backyard to get started. With just a few basic principles, anyone can create their own compost pile. Whether you’re an urban dweller with a small balcony or a homeowner with a spacious yard, composting can fit into your lifestyle. Are you ready to roll up your sleeves and dive into the world of compost? Let’s explore the essential steps and tips to turn those kitchen scraps into something extraordinary.

The Basics of Composting

Composting is the natural process of recycling organic material, like food scraps and yard waste, into a rich soil amendment known as compost. But what does that mean in practice? At its core, composting harnesses the power of microorganisms, worms, and other decomposers to break down organic matter. This process not only reduces waste but also enriches your soil with essential nutrients.

The typical composting process involves layering “greens” (nitrogen-rich materials like kitchen scraps and grass clippings) with “browns” (carbon-rich materials like dried leaves and cardboard). This balance is crucial; too many greens can lead to a smelly pile, while too many browns can slow down decomposition. A common misconception is that you need a fancy compost bin. In reality, a simple pile or a homemade bin can do the trick. Have you considered where you would place your compost pile? The right location can make a difference in the speed of decomposition.

What to Compost: The Do’s and Don’ts

One of the most common questions new composters have is, “What can I compost?” The answer is quite expansive. Cooked foods, eggshells, coffee grounds, fruit and vegetable scraps, grass clippings, and dried leaves can all go into your compost. Here’s a quick checklist to help you remember:

  • Do compost: Vegetable scraps, coffee grounds, tea bags, eggshells, grass clippings, and dried leaves.
  • Don’t compost: Meat, dairy, oily foods, and diseased plants.

Let’s talk about a real-life example. Sarah, a passionate gardener living in a small apartment, started composting her kitchen scraps in a simple worm bin. Initially hesitant, she discovered that even small kitchens can yield a surprising amount of organic matter. Within just a few months, she had produced enough worm castings to nourish her houseplants. Isn’t it amazing how a little effort can lead to such rewarding results?

How to Start Composting at Home

Starting your compost pile doesn’t have to be daunting. To begin, choose a location that’s convenient for you—somewhere accessible but not too close to your living spaces to avoid odors. If you’re using a bin, make sure it has proper ventilation. Start by layering your browns and greens, mixing them together as you go. The key is to maintain a good balance, so your compost doesn’t become too wet or dry.

One effective strategy is to keep a compost bucket in your kitchen. This way, you can easily collect scraps throughout the week. Once it’s full, take it out to your compost pile. Did you know that maintaining the right moisture level can significantly speed up the composting process? Aim for a consistency similar to a wrung-out sponge. If it’s too dry, sprinkle some water; if it’s too wet, add more browns.

Maintaining Your Compost Pile

Once you’ve started your compost pile, the work isn’t over. Regular maintenance is vital to ensure that your compost breaks down efficiently. Turn your pile every few weeks to aerate it, which accelerates the decomposition process. This also helps to mix the layers, ensuring that all materials are equally broken down. Have you ever turned a compost pile? It’s a bit like flipping a cake—satisfying and essential for the final product!

Another important aspect is temperature. A well-managed compost pile can heat up significantly, promoting the decomposition of materials. Monitoring the temperature allows you to know when to aerate and when to add materials. If your compost pile has been active for several months, it might be time to sift through it for finished compost, which should be dark, crumbly, and earthy-smelling. Trust me; the first time you see that black gold, you’ll be inspired to compost even more!

Using Finished Compost

Once your compost is ready, the possibilities are endless. You can use it to enrich your garden beds, add it to potting soil, or even sprinkle it around your houseplants. Finished compost not only improves soil structure but also enhances water retention and provides a steady supply of nutrients to plants. Imagine transforming your garden into a lush paradise with minimal effort—all thanks to your kitchen scraps!

Take the story of John, an avid landscaper who started using compost in his garden. After a year of composting, he noticed healthier plants and a more vibrant garden. His neighbors began to ask for his secret, and John happily shared his composting journey. “Once you see the difference it makes, you’ll never throw away food scraps again!” he often tells them.

At the end of the day, composting is a powerful tool for sustainability. It’s not just an eco-friendly practice; it’s a way to connect with nature and participate in the cycle of life. So, what are you waiting for?

Join the Composting Movement

Composting isn’t just for gardening enthusiasts or eco-warriors. It’s a simple and impactful way to make a difference in your home and the environment. By composting, you’re not only reducing waste but also nurturing the earth that provides for us. Plus, the skills you develop—patience, observation, and care—are invaluable.

So, do you feel inspired to start your own composting journey? Picture this: you, standing proudly next to a thriving garden, knowing you turned what would have been waste into a vibrant source of life. Go ahead, give it a shot! Share your composting success stories or ask questions in the comments below. Happy composting!

How to Improve Garden Soil Without Chemical Fertilizers

How to Improve Garden Soil Without Chemical Fertilizers

The secret to a thriving garden lies not just in the plants you choose, but in the soil that nurtures them. Have you ever considered the impact that chemical fertilizers might have on your garden’s ecosystem? While these products can deliver quick results, they often lead to long-term soil degradation and can harm beneficial microbes. Here’s the truth: improving your garden soil can be achieved with natural methods that enhance fertility without relying on synthetic chemicals.

Imagine walking through a lush garden—vibrant flowers, robust vegetables, and the air filled with the scent of fresh earth. This beauty isn’t just a product of good seeds and diligent watering; it all starts with rich, healthy soil. But how do you create that optimal environment for your plants? The answer lies in understanding the components of soil health and utilizing organic techniques to improve its structure, fertility, and biodiversity.

Understanding Soil Composition

To improve your garden soil, it’s essential first to understand its basic components: minerals, organic matter, air, and water. Mineral content provides the structural framework of the soil, while organic matter, such as decomposed plants and animal waste, enriches it with nutrients. Here’s the thing: when you disrupt the balance with chemical fertilizers, you may inadvertently strip away this organic matter, leaving your soil barren and lifeless.

For example, consider the case of a gardener named Lisa. She inherited a garden that had been treated with chemical fertilizers for years. At first, she saw quick results, but over time, her plants struggled to thrive. After researching soil health, Lisa decided to implement organic practices. She began composting kitchen scraps and yard waste, significantly boosting the organic matter in her garden. This pivot not only revitalized her plants but also created a thriving ecosystem beneath the surface.

Add Organic Matter

Organic matter is like a magic potion for your garden soil. It improves drainage, retains moisture, and provides essential nutrients that plants need to flourish. But what are the best sources? Compost, well-rotted manure, leaf mold, and green manures are all excellent choices. The beauty of composting is that it transforms your kitchen scraps and garden waste into a goldmine of nutrients, which you can then cycle back into your soil.

Picture this: every time you toss vegetable peels or coffee grounds into your compost bin, you’re making a deposit in your garden’s health bank. When you work this finished compost into your soil, you enrich it with a wealth of nutrients and beneficial microorganisms. At the end of the day, organic matter acts as a sponge, holding onto water and nutrients that your plants can access when needed.

Practice Crop Rotation

Crop rotation isn’t just a practical farming technique; it’s a powerful strategy for improving soil health. By changing the types of crops you grow in a specific area each year, you can prevent nutrient depletion and reduce the buildup of pests and diseases. This method not only enhances soil quality but also promotes biodiversity in your garden.

Take, for instance, a farmer named John who grows vegetables. He used to plant tomatoes in the same spot every year. However, after realizing that his soil was becoming less fertile over time, he decided to implement a crop rotation plan. The following season, he alternated tomatoes with legumes like beans and peas, which fix nitrogen in the soil. As a result, his tomato yield improved dramatically the next planting season—a testament to the power of thoughtful crop management!

Utilize Mulching Techniques

Mulching is another fantastic method to improve your garden soil without resorting to chemicals. Applying a layer of organic material—like straw, grass clippings, or shredded leaves—helps suppress weeds, retains moisture, and regulates soil temperature. Moreover, as that mulch breaks down, it enriches the soil with nutrients.

Encourage Natural Soil Life

Healthy soil is teeming with life. Earthworms, beneficial insects, and microorganisms all contribute to soil fertility and structure. But how can we encourage this thriving underground community? One effective way is to reduce soil disturbance. Practices like no-till gardening help maintain the soil structure and protect the organisms that live within it.

Conclusion