Growing Carrots in Your Backyard: Secrets for Sweet Roots

Growing Carrots in Your Backyard: Secrets for Sweet Roots

Picture this: You step into your backyard, and with every breath, you’re greeted by the earthy aroma of fresh vegetables. Among them, the sweet, crisp bite of a freshly harvested carrot stands out. Have you ever wondered what makes homegrown carrots taste so much better than store-bought ones? It turns out, growing carrots isn’t just about planting seeds and waiting. There’s an art to it, filled with secrets that transform ordinary roots into a sweet delight.

For many novice gardeners, the idea of growing carrots might seem daunting. After all, aren’t they just root vegetables? But here’s the thing: carrots thrive in specific conditions. They demand attention, care, and a little know-how. The delightful crunch and sweetness of a homegrown carrot can make the effort worthwhile. So, let’s dig into the essential secrets to growing carrots right in your backyard.

Choosing the Right Variety

When it comes to carrots, variety matters. Did you know that there are over 100 different types of carrots? Each variety boasts its unique flavor profile, texture, and color. While some gardeners swear by the classic orange carrot, others may find joy in growing purple or white varieties. For instance, the ‘Nantes’ carrots are known for their sweetness and tender texture, making them perfect for munching straight from the garden.

Consider your local climate when selecting your carrot variety. For warmer regions, heat-tolerant types like ‘Danvers’ are ideal, as they can handle the heat without turning bitter. In contrast, cooler regions might favor varieties like ‘Short n’ Sweet’ that mature quickly. So, what’s your favorite type of carrot? Knowing the answer could set you on the right path to achieving sweet roots.

Preparing Your Soil

Soil preparation is the backbone of successful carrot growth. Carrots prefer loose, well-drained soil that allows them to grow straight and unobstructed. Compacted or rocky soil can lead to misshapen roots, which is something no gardener wants. Before planting, take the time to amend your soil with organic matter, such as compost or well-rotted manure. This not only enriches the nutrients but also improves soil structure.

Imagine pulling a perfectly shaped carrot from the earth; it’s the little details in the preparation that lead to that moment of triumph. A simple soil test can also help you understand if your pH levels are conducive to carrot growth, which ideally should be between 6.0 and 6.8. Have you ever noticed how some gardens produce beautifully shaped carrots while others struggle? The soil preparation could very well be the secret ingredient.

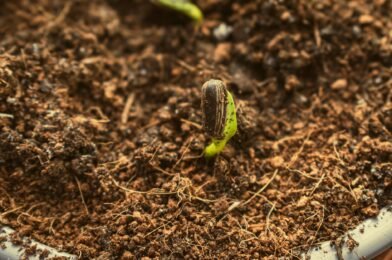
Sowing and Spacing Techniques

When it comes to sowing carrot seeds, timing is everything. Carrots thrive in cool weather, making early spring or late summer the perfect time for sowing. Planting seeds too closely can lead to overcrowding, which might result in stunted growth. Aim for a spacing of about 2 to 4 inches between seeds, which will allow each carrot enough room to grow without competing for nutrients.

Many gardeners make the mistake of planting seeds too deep, leading to poor germination. Ideal soil depth for carrot seeds is about 1/4 inch. It’s fascinating how something so simple can impact your harvest. Try using a seed tape or a row marker to keep your sowing uniform. This method not only saves time but can also create a visually appealing garden. What’s your current experience with sowing seeds? Is it more of a chore or a joy for you?

Watering and Nutrient Management

Watering is another critical factor in growing sweet carrots. They need consistent moisture, especially during germination when the seeds are fragile. Aim for about an inch of water per week, adjusting based on rainfall. A simple trick is to mulch around your carrot plants; this retains moisture while suppressing weeds that compete for resources.

Fertilizing your carrots can be a bit of a balancing act. Carrots don’t require heavy feeding, as too much nitrogen can lead to leafy tops at the expense of root development. Instead, opt for a low-nitrogen fertilizer, focusing on phosphorus and potassium to promote healthy root growth. Here’s a recommendation: mix in some bone meal or rock phosphate to give your carrots that extra boost. Have you thought about your watering strategy as part of your gardening journey?

Harvesting for Maximum Flavor

Nothing compares to the moment when you finally pull up your carrots. But timing your harvest is crucial for achieving that sweet flavor we all crave. Carrots typically take about 70 to 80 days to mature. The best way to know when to harvest is by checking the size; mature carrots should be about the diameter of a pencil. Pulling them too early can mean sacrificing sweetness, while leaving them too long can lead to a woody texture.

Consider this: it’s often recommended to harvest carrots after a good rain. The moisture in the soil makes lifting them easier and also enhances their flavor. As you gather your carrots, take a moment to appreciate the journey from seed to harvest. What’s that satisfaction like for you? Each carrot is a testament to your hard work and care.

Storing Your Carrots

Once you’ve harvested your carrots, proper storage is key to maintaining their freshness and flavor. Surprisingly, many gardeners overlook this vital step. Ideally, store your carrots in a cool, dark place like a root cellar. They can last for weeks in a moisture-retentive environment, like a plastic bag with a slightly damp paper towel. By keeping them out of direct sunlight, you prevent them from losing their sweetness and crunch.

If you have an abundant harvest, consider freezing or pickling them for future use. Here’s a quick tip: blanching carrots before freezing helps preserve their vibrant color and nutrients. Have you ever tried preserving your garden’s bounty? It can be an exciting way to enjoy your hard work long after the season has ended.

Growing carrots in your backyard can be a rewarding journey filled with sweet rewards. By choosing the right variety, preparing your soil, and adhering to proper care techniques, you can cultivate a bountiful harvest. So why not take the plunge this season? Start small, experiment, and share your experiences with fellow gardening enthusiasts. What secrets will you uncover in your quest for the perfect carrot?

How to Grow Zucchini Without the Common Mistakes

How to Grow Zucchini Without the Common Mistakes

Have you ever experienced the thrill of biting into a fresh, homegrown zucchini? There’s something undeniably satisfying about growing your own vegetables. Yet, for many aspiring gardeners, zucchini seems to be one of the trickier crops to cultivate. Why is that? Often, it’s due to a few common mistakes that can easily be avoided with the right knowledge.

Picture this: you’ve planted your zucchini seeds, eagerly anticipating the fruits of your labor. As the weeks go by, your excitement turns to frustration when you realize your plants are stunted or worse, not producing at all. What went wrong? This article will guide you through the essential strategies to successfully grow zucchini, sidestepping those all-too-common pitfalls. Let’s dig in!

Understanding Zucchini’s Needs

The first step to cultivating robust zucchini plants is understanding their specific needs. Zucchini thrives in warm weather, requiring full sun exposure for at least six hours per day. If you’re planting in spring, ensure that the soil temperature has warmed to at least 70°F before sowing seeds. What most people miss is the importance of well-draining soil. Zucchini roots can rot in overly saturated conditions, so it’s crucial to amend your garden soil with organic matter to enhance drainage.

Last summer, I had a friend who was convinced that just planting the seeds would yield a bountiful harvest. Unfortunately, he planted too early, and the cold soil stunted the growth. By the time he realized his mistake, the season had slipped away. It’s a classic example of why timing and soil conditions are vital in growing zucchini successfully!

Choosing the Right Variety

Believe it or not, choosing the right zucchini variety can significantly affect your success. From classic green zucchinis to the striking yellow or even striped varieties, each type comes with unique growth characteristics. Some are more resistant to common pests like squash bugs, while others may yield a more prolific harvest. Have you ever tried a hybrid zucchini? They often combine the best traits of different varieties, giving you the resilience and flavor you crave.

This past season, I decided to experiment with both a traditional green zucchini and a hybrid variety. The hybrid not only sprouted faster but also produced more zucchinis, even under less-than-ideal conditions. If you’re passionate about gardening, take the time to research various zucchini types and pick those that suit your climate and gardening style!

Watering Practices: Too Much or Too Little?

Watering zucchini can be a double-edged sword. On one hand, these plants need ample moisture to thrive; on the other, overwatering can lead to root rot. So, how do you find the balance? The key lies in consistently monitoring soil moisture. A simple rule of thumb is to water deeply once a week, ensuring that the water reaches the roots. If your garden is sandy, you might need to water more frequently.

Let me share a story. A neighbor of mine was convinced that daily watering was the way to go. Initially, her zucchini plants looked healthy, but by mid-summer, yellowing leaves and wilting stalks became a common sight. The daily watering was suffocating the roots! By switching to deep, weekly watering, her plants bounced back, showcasing the resilience of zucchini when treated correctly.

Pest Management Without Harm

We can’t discuss growing zucchini without addressing the inevitable pests that will come knocking. Aphids, squash bugs, and cucumber beetles are notorious for munching on zucchini leaves and stems. Instead of resorting to harsh chemicals, consider natural pest management strategies. Introducing beneficial insects like ladybugs can help keep harmful pests in check. Additionally, planting companion crops such as marigolds can act as a natural deterrent.

Last year, I noticed my zucchini plants were being attacked by aphids. Instead of panicking, I planted a few marigolds nearby, and to my surprise, the problem diminished significantly. This natural approach not only ensured a healthy zucchini crop but also created a vibrant garden ecosystem. Have you considered natural pest control methods?

Harvesting at the Right Time

Finally, the satisfaction of growing zucchini culminates in the harvest. But don’t let excitement lead to premature picking! Zucchini should be harvested when they are about 6 to 8 inches long for optimal flavor and texture. If left too long, they can become tough and seedy, ultimately diminishing your hard work. The truth is, frequent harvesting encourages the plant to produce even more fruit.

I recall the first time I grew zucchini. Eager to enjoy them, I picked them too early. While they looked perfect, the flavor was bland. It wasn’t until I waited a few more days for the next batch that I truly appreciated the difference in taste. So, pay attention to size and color—your palate will thank you!

Conclusion: Your Zucchini Adventure Awaits

Growing Cucumbers in Small Spaces: Tips That Work

Growing Cucumbers in Small Spaces: Tips That Work

Have you ever stared at a tiny balcony or a small backyard and thought, “Could I really grow my own cucumbers here?” You’re not alone. Many urban gardeners face the challenge of limited space but still crave the taste of homegrown vegetables. The truth is, with a little creativity and the right techniques, you can cultivate delicious cucumbers even in the most confined areas. Isn’t it exciting to imagine plucking fresh produce from your own garden, no matter how small?

Cucumbers are among the most rewarding vegetables to grow, offering crisp textures and refreshing flavors. They can be used in salads, sandwiches, and even cocktails! But small-space gardening doesn’t just mean cramming plants together; it’s about making smart choices that maximize your area. So, are you ready to transform your little nook into a thriving cucumber patch? Let’s dig into some expert tips that will make it possible!

Choosing the Right Variety

One of the first steps to successful cucumber gardening is selecting the right variety. Not all cucumbers are created equal—some are better suited for smaller spaces than others. For instance, consider growing bush varieties like ‘Organic Spacemaster’ or ‘Bush Champion.’ These compact options are perfect for container gardening, thriving without sprawling all over your patio or balcony.

When I first attempted to grow cucumbers in a small space, I made the mistake of choosing a vining variety. It quickly took over every inch of my limited area and even started creeping into my neighbor’s garden! That experience taught me that knowing your plants is key. The right variety will not only fit your limited area but also yield plenty of fruit. So, what will you choose for your tiny garden?

Utilizing Vertical Space

Vertical gardening is a game-changer for small spaces. Instead of letting your cucumber plants spread across the ground, give them a structure to climb. A trellis, fence, or even a simple set of stakes can make a significant difference. By training your cucumbers to grow upwards, you’ll free up valuable ground space for other plants while also improving air circulation around your cucumbers, reducing the risk of disease.

In my own garden, I built a simple trellis out of repurposed wood, which not only saved space but also added a decorative element to my patio. Watching the vines climb higher and higher was a rewarding experience, and I soon found myself harvesting cucumbers in abundance. Remember, the sky’s the limit—how will you support your cucumbers on their vertical journey?

Optimal Soil and Planting Techniques

The foundation of any successful garden is quality soil. Cucumbers thrive in well-draining, nutrient-rich soil. If you’re growing in containers, look for a high-quality potting mix that provides the right balance of moisture retention and drainage. Remember, containers should have sufficient drainage holes to prevent waterlogging, which can lead to root rot.

When planting, aim for a depth of about an inch for seeds or place seedlings at the recommended depth, depending on the variety. I learned early on that spacing is critical; even in small gardens, overcrowding results in poor air circulation and diminishes yields. Aim for a spacing of about 12 to 18 inches for bush varieties and 36 inches for vining types, especially if they’re on a trellis. With good soil and the right techniques, your cucumbers will thrive!

Watering Wisely

Watering can make or break your cucumber crop. Cucumbers have high water needs, particularly during the fruiting stage. However, it’s essential to find a balance; overwatering can be just as detrimental as underwatering. Ideally, you want to keep the soil consistently moist without saturating it.

During my first cucumber-growing season, I discovered the benefits of drip irrigation. This method allowed me to provide a steady supply of moisture directly to the roots without wetting the leaves, which can encourage fungal diseases. Another effective technique is to use self-watering containers that help to maintain consistent moisture levels. Remember, what’s your strategy for keeping those plants hydrated?

Pest Management in Small Spaces

Every gardener fears pests invading their precious plants, especially when space is limited. The good news is that managing pests doesn’t require a chemical arsenal. Simple prevention strategies can go a long way. Start by keeping your garden clean; remove any debris that could harbor pests, and practice crop rotation if you can.

In my own experience, introducing companion plants such as marigolds can deter cucumber beetles while attracting beneficial insects like ladybugs, which help control aphids. Additionally, using netting or row covers can protect your young seedlings from pests. Here’s a thought: how might you create a pest barrier for your own cucumbers?

Harvesting for Maximum Flavor

Finally, the moment of truth—harvesting your cucumbers! Timing is crucial; cucumbers should be picked when they’re young and firm, usually around 6 to 8 inches long, depending on the variety. If left on the vine too long, they can become bitter and seedy, which is not what we’re after.

I remember my first cucumber harvest. I was so excited that I picked them early one afternoon. The satisfaction of enjoying that fresh taste, picked just moments ago, made all the effort worthwhile. Harvesting regularly also encourages the plant to produce more, so don’t be shy; get out there and reap the rewards of your hard work!

Growing cucumbers in small spaces may seem challenging, but with the right mindset and strategies, it can be a delightful experience. From selecting the right variety and utilizing vertical space to practicing wise watering techniques and managing pests, you can create a healthy cucumber garden. Have you tried any of these methods before? What are your plans for growing cucumbers this season?

Don’t forget to share your gardening successes and challenges! Let’s inspire one another—drop a comment below or share this article with fellow garden enthusiasts!

How to Grow Peppers: From Seedling to Spicy Harvest

How to Grow Peppers: From Seedling to Spicy Harvest

Imagine biting into a juicy, home-grown pepper, bursting with flavor, and just the right amount of heat. Not only do they add zest to your dishes, but growing peppers can also be a rewarding gardening experience. Whether you’re a seasoned gardener or just starting out, you might be surprised by how straightforward it is to cultivate your own vibrant pepper plants. Have you ever thought about the journey from seedling to spicy harvest? Let’s explore that fascinating process!

Many gardeners often overlook the potential of growing peppers, thinking they require too much effort. Here’s the truth: with the right conditions and a sprinkle of patience, you can enjoy a bountiful harvest. From sweet bell peppers to fiery jalapeños, there are countless varieties to choose from, each bringing its own unique flavor profile to your meals. So, how do you get started? Let’s dive into the essentials of growing peppers, ensuring your garden is overflowing with color, flavor, and spice!

Choosing the Right Pepper Varieties

Before you even think about planting, it’s crucial to select the right pepper varieties for your climate and taste preferences. Sweet peppers, like bell peppers and banana peppers, tend to be milder, while hot peppers, such as habaneros and serranos, can pack quite a punch. Do you want to spice up your salsa or simply add crunch to salads? Your choice matters!

Consider starting with a few popular varieties that are relatively easy to grow. For example, ‘California Wonder’ is a classic bell pepper known for its crisp texture and flavor. On the spicy side, ‘Serrano’ peppers are a favorite among salsa enthusiasts and add a delightful kick without overwhelming heat. By selecting a variety that meets your culinary needs, you’re setting yourself up for a successful growing season.

Starting Your Peppers from Seeds

Once you’ve selected your preferred pepper varieties, it’s time to get your hands dirty. Starting peppers from seeds can be a fun and educational experience. You’ll need seed trays and a high-quality seed-starting mix. Fill the trays with the soil mix, and gently press the seeds into the soil about a quarter-inch deep. Water them lightly and place the trays in a warm, sunny spot. Here’s a little tip: peppers love warmth, so maintaining a temperature between 70°F and 85°F will help them germinate faster.

In about 7 to 14 days, you should start to see those tiny green shoots emerge. Once the seedlings have developed their first set of true leaves, it’s time to transplant them into larger pots. This process, known as pricking out, helps to give your seedlings the space they need to grow strong and healthy. Have you ever seen a seedling thrive and grow into a robust plant? It’s nothing short of magical!

Transplanting to the Garden

With your seedlings ready for action, they’re now prepared for their new home in the garden. Choose a sunny spot that receives at least six hours of direct sunlight. Prior to planting, it’s wise to amend the soil with organic matter or compost to enhance its fertility. When the last frost has passed and the soil has warmed, you can begin transplanting your pepper plants.

Space your plants about 18 to 24 inches apart to allow for adequate air circulation. When planting, ensure the root ball is level with the soil surface to avoid overwatering issues. Here’s a personal story: I remember my first experience transplanting peppers; I was nervous! I gently placed each seedling into the ground, thinking about how these tiny plants would soon become vibrant contributors to my summer dishes. The anticipation was part of the joy!

Watering and Care for Healthy Growth

Once your peppers are in the ground, proper watering and care are paramount. Peppers prefer consistent moisture but detest soggy soil. A good rule of thumb is to water them deeply once a week, allowing the top few inches of soil to dry out between watering. This helps encourage deeper root growth and contributes to stronger plants.

Fertilization is also key to ensuring your peppers thrive. A balanced fertilizer, applied every four to six weeks, will provide the nutrients they need to produce those prized fruits. Have you ever wondered why some gardeners have massive pepper harvests? Often, it’s due to their commitment to maintaining proper nutrition for their plants. It does take some effort, but the end result is so rewarding!

Harvesting Your Peppers

After weeks of care, you’ll eventually find yourself eagerly awaiting the harvest. The beauty of peppers is that you can pick them at various stages of ripeness. Green peppers are simply unripe versions of their colorful counterparts. Allowing them to ripen further will yield reds, yellows, and oranges, each with a unique taste and sweetness.

To harvest, gently twist the pepper off the plant or use pruning shears to avoid damaging the fruit or the plant itself. Here’s a little secret: the longer you leave the peppers on the plant, the sweeter they become, as the sugars develop during ripening. So, if you’re not in a hurry, let those beauties bask in the sun a little longer!

Storing and Using Your Harvest

After your peppers have been harvested, it’s essential to know how to store and use them effectively. Fresh peppers can be kept in the refrigerator for about a week. If you’re looking to preserve some of your harvest, consider freezing them! Simply wash, chop, and place them in freezer bags for later use in soups, stews, or stir-fries.

Additionally, you can explore various ways to enjoy your peppers: roasting, adding them to salsas, or incorporating them into your favorite stir-fry recipes. One memorable dish I created with my home-grown peppers was a vibrant stuffed pepper casserole, packed with flavor and color. The satisfaction of cooking with ingredients you’ve nurtured from the ground up is unparalleled!

By now, you’ve learned the essential steps to grow peppers—from selecting the right variety to harvesting and enjoying your crop. So, are you ready to embark on this spicy gardening adventure? With a little effort, you can fill your kitchen with fresh, homegrown peppers that will elevate your culinary game.

Do you have any tips or experiences growing peppers of your own? Share your thoughts in the comments below, and let’s spice up the gardening conversation!

Growing Lettuce at Home: Fresh Salads All Season Long

Growing Lettuce at Home: Fresh Salads All Season Long

Imagine stepping out your back door, heading to your garden, and plucking fresh, crisp lettuce to toss into your salad. Sounds dreamy, right? Growing lettuce at home isn’t just a fun hobby; it’s a ticket to fresher, tastier greens that can elevate your everyday meals. With just a little space, some sunlight, and the right techniques, you can enjoy an abundance of salads all season long. So, are you ready to dig in?

What many people don’t realize is that lettuce is one of the easiest vegetables to grow. With a range of varieties to choose from, you can enjoy different textures and flavors—from the tender leaves of butterhead to the crunchy romaine. Plus, lettuce thrives in cooler weather, making it a fantastic option for spring and fall gardens. So, if you’ve been contemplating your green thumb potential, growing lettuce at home might just be your gateway to vegetable gardening.

Choosing the Right Lettuce Varieties

When it comes to selecting lettuce varieties, the options are abundant. Each type brings its own unique flavor and texture, perfect for satisfying diverse palate preferences. Butterhead lettuce, with its soft, rounded leaves, offers a sweet taste that’s perfect for salads. On the other hand, crisphead varieties like Iceberg are recognized for their crunchy texture, making them ideal for those who love a good crunch in their dishes.

Consider this: Did you know that some lettuce types are better suited for warmer climates while others thrive in cooler temperatures? For instance, romaine is known for its ability to withstand heat better than other types. By understanding the characteristics of various lettuces, you’ll not only maximize your yield but also enjoy a colorful and diverse salad bowl throughout the seasons. What types of lettuce do you find yourself gravitating toward?

Preparing the Soil: The Foundation of Successful Growth

Before you even think about planting seeds, it’s crucial to prepare a healthy growing environment. Lettuce prefers well-drained soil enriched with organic matter. Incorporating compost not only adds nutrients but also improves soil structure. A good rule of thumb is to mix in about one part compost to three parts soil. This creates a nutrient-rich environment where your lettuce can thrive.

Let me share a personal experience: when I first started growing lettuce, I overlooked the importance of soil quality. My plants struggled to grow, and I ended up with a sad little crop. After doing some research, I invested time in preparing my soil properly. The difference was night and day! Healthy, vibrant greens emerged, and my salads transformed into something extraordinary. If you want lush lettuce, don’t skip this essential step!

Planting and Caring for Your Lettuce

Once your soil is ready, it’s time for the fun part—planting! You can either start lettuce indoors in trays or sow seeds directly into the garden bed. If you’re looking for quicker results, consider using seed tapes, which simplify the planting process and allow for even spacing. Whichever method you choose, be sure to plant your seeds about 1/4 to 1/2 inch deep. After planting, water the area gently to avoid displacing the seeds.

Caring for your lettuce doesn’t end at planting. Regular watering is essential, particularly during dry spells. Lettuce has a shallow root system, which means it can dry out quickly. Aim for about an inch of water per week, either from rainfall or supplemental watering. What’s more, you may want to consider mulching around your plants. This not only helps retain moisture but also suppresses weeds, giving your lettuce the space it needs to flourish.

Harvesting: The Reward for Your Efforts

The excitement builds as your lettuce reaches maturity, but when is the right time to harvest? Most lettuce varieties are ready to pick in about 30 to 70 days after planting, depending on the type. Generally, you can begin trimming leaves once they are around 4 to 6 inches long; just remember to leave a few leaves behind to allow the plant to continue growing.

One hot summer, I harvested my romaine too late, only to discover it had turned bitter. Lesson learned! The best way to enjoy your harvest is to pick it young and tender. Additionally, lettuce can be harvested multiple times. By cutting just the outer leaves, the inner leaves will continue to grow, providing you with fresh greens for weeks. Wouldn’t that be a delightful way to keep your salads vibrant?

Dealing with Common Pests and Problems

As with any gardening endeavor, growing lettuce comes with its own set of challenges. Pests like aphids and slugs can wreak havoc on your crop. A simple solution is to use row covers to protect your plants from these intruders. Another approach involves regularly inspecting your plants and hand-picking any visible pests. Moreover, introducing beneficial insects like ladybugs can help keep pests in check.

In my own garden, I faced an unexpected aphid invasion. I was devastated, but I quickly learned that simply spraying a mixture of water and dish soap helped clear them away without harmful chemicals. The resilience of lettuce is truly impressive. With a little vigilance, you can ensure a healthy harvest, free from unwanted guests.

Enjoying the Fruits of Your Labor

After all the effort you put into growing your lettuce, it’s time to savor the rewards. Fresh salads are only the beginning! You can create delicious lettuce wraps, use it as a garnish, or even blend it into smoothies for added nutrition. The beauty of homegrown lettuce is that it enhances not just flavor but also the nutritional quality of your meals.

Have you ever tried a simple salad with olive oil, lemon juice, and a sprinkle of salt using your homegrown lettuce? The taste is a revelation! It’s incredible how much more vibrant and flavorful greens become when they are freshly harvested. With your homegrown lettuce, you can experiment with dressings and toppings, creating endless possibilities to impress friends and family.

Ultimately, growing your own lettuce not only provides delicious ingredients for your meals but also brings a sense of accomplishment and connection to nature. Whether you’re a seasoned gardener or just starting, there’s something deeply satisfying about sowing seeds and watching them thrive.

So, are you ready to take the plunge? Grab some seeds, prepare your soil, and start your journey to fresh salads all season long. Remember, every expert gardener started as a beginner, and with a little patience, you’ll be savoring the fruits of your labor in no time. What will you grow in your garden this year?

How to Grow Tomatoes From Seed to Harvest

How to Grow Tomatoes From Seed to Harvest: A Comprehensive Guide

Imagine biting into a juicy, sun-ripened tomato plucked fresh from your garden. The flavor bursts in your mouth, far surpassing anything you could find at the grocery store. Sounds tempting, right? Growing tomatoes from seed to harvest is a rewarding journey that many gardeners embark on every year. But where do you start, and how do you ensure a bountiful yield? Let’s delve into the process of cultivating these beloved vegetables from scratch.

Tomatoes are not just a popular choice for home gardens; they are also a fantastic way to connect with nature. The satisfaction of nurturing a tiny seed into a fruit-bearing plant is unparalleled. However, many novice gardeners often underestimate the nuances involved in this process. From selecting the right seeds to understanding the ideal growing conditions, each step plays a crucial role in your tomato-growing adventure. So grab your gardening gloves and let’s dig into the essentials!

Choosing the Right Tomato Variety

The first step in your tomato-growing journey is selecting the right variety. There are essentially two types of tomatoes: determinate and indeterminate. Determinate varieties grow to a specific height and produce fruit all at once, which is perfect for canning. On the other hand, indeterminate varieties keep growing and producing throughout the season, allowing for a continuous harvest. Think about what fits your lifestyle better. Are you looking to preserve your harvest or enjoy fresh tomatoes throughout the summer?

For instance, if you have a small patio garden, consider growing determinate varieties such as ‘Patio Princess.’ These plants require less space and are ideal for container gardening. On the contrary, if you’re eager for a steady supply of tomatoes for salads, sauces, and sandwiches, indeterminate varieties like ‘Brandywine’ or ‘Cherokee Purple’ are excellent choices. Knowing what you want to achieve with your tomatoes will guide your selection process.

Starting Seeds Indoors

Once you’ve selected your varieties, it’s time to start the seeds indoors. Ideally, you’ll want to begin this process 6 to 8 weeks before the last expected frost date in your area. Use seed trays or small pots filled with a seed-starting mix. Make sure to water the soil thoroughly before planting your seeds. Each seed should be planted about 1/4 inch deep; you can place two seeds per pot for a better chance of germination.

Here’s the thing: light is crucial! If you don’t have a sunny window, consider investing in grow lights. Position them about 2-4 inches above the seedlings and keep them on for 12-16 hours a day. Also, keep an eye on the soil moisture; it should be damp but never soggy. After about a week or two, you should see little green shoots emerging, signaling the beginning of your tomato journey!

Transplanting to Larger Pots

When your seedlings have grown at least two sets of true leaves, it’s time to transplant them into larger pots. This process is essential because it gives the roots room to grow. Gently remove the seedlings from their initial containers, taking care not to damage their delicate roots. Plant them deep into the new pots, burying the stem up to the first set of leaves. This will encourage a stronger root system, which is vital for healthy plants.

Consider this: have you ever heard of “hardening off” your plants? It’s a crucial step that many people overlook. About a week before you plan to move your tomatoes outside, start acclimating them to outdoor conditions. Place them outside for a few hours each day, gradually increasing their exposure to sunlight and wind. This will help ease the transition and reduce transplant shock.

Planting Outdoors

After the danger of frost has passed, you can finally plant your tomatoes outdoors. Choose a location in your garden that receives at least 6-8 hours of full sunlight each day. Prepare the soil by mixing in compost or well-rotted manure to ensure it’s nutrient-rich. Dig holes about 18-24 inches apart, depending on the variety, and plant your seedlings deeply, just as you did in the larger pots.

At this stage, staking or caging your plants is also crucial. Tomatoes can become quite top-heavy when they’re bearing fruit, and without support, they can break or become diseased. Using stakes or cages early on not only saves you the hassle later but also promotes air circulation around the plants, reducing the risk of disease.

Watering and Fertilizing

Watering is a critical aspect of growing tomatoes. They thrive on consistent moisture but dislike sitting in waterlogged soil. A good rule of thumb is to water deeply once a week, allowing the top inch of the soil to dry out between watering sessions. This encourages deep root growth, which will help the plant access moisture and nutrients more effectively.

When it comes to fertilizing, a balanced fertilizer is your best friend. Many gardeners prefer using organic options, such as fish emulsion or compost tea, during the early growth stages. Once the plants begin to flower, switch to a low-nitrogen fertilizer to promote fruit development. Understanding the nutritional needs of your tomatoes will significantly affect your yield. Don’t forget to keep an eye on any signs of nutrient deficiencies, like yellowing leaves, which may indicate the need for additional food!

Harvesting Your Tomatoes

As summer rolls in, you’ll notice your hard work beginning to pay off. The fruits will start to swell and change color, ranging from vibrant reds to sunny yellows, depending on the variety you’ve chosen. But how do you know when it’s the right time to harvest? The truth is, tomatoes are best picked when they are fully ripe. Look for a deep color and a slight give when you gently squeeze them.

It’s easy to get excited and pick them too early, but doing so may affect the flavor. Remember, tomatoes continue to ripen off the vine, so if you’re concerned about pests or inclement weather, you can pick them just shy of their peak ripeness and let them finish on your kitchen counter. How satisfying it is to know that you’ve nurtured something from seed all the way to your dinner plate!

Common Challenges and Solutions

Despite your best efforts, you might encounter some hurdles along the way. Pests such as aphids and tomato hornworms can wreak havoc on your prized plants. The good news is that there are organic solutions available. For instance, hand-picking pests or using insecticidal soap can be effective. You can also introduce beneficial insects like ladybugs to your garden, which can help control pest populations naturally.

Additionally, keep an eye out for diseases such as blight or blossom end rot. These common issues can often be prevented with proper watering practices and crop rotation. If you notice any signs of disease, act quickly by removing affected leaves or using disease-resistant tomato varieties as a proactive measure. Gardening is a learning journey, and adapting your approach based on experiences will make you a better gardener!

As you can see, growing tomatoes from seed to harvest is not just about planting and watering; it’s a multifaceted process that requires attention to detail and a bit of patience. Are you ready to embark on this rewarding gardening journey? Share your experiences, ask questions, or comment below about your favorite tomato varieties!