Essential Garden Tools Every Beginner Needs in Their Shed

Essential Garden Tools Every Beginner Needs in Their Shed

Are you aspiring to create a lush garden oasis but don’t know where to start? You’re not alone. Many beginners find themselves overwhelmed in the vast world of gardening. The truth is, the right tools can make all the difference in transforming your backyard into a green paradise. Imagine planting your first flowerbed or harvesting fresh vegetables, all while enjoying the satisfaction that comes from nurturing life. But what tools do you truly need?

In a landscape filled with options, it’s easy to get lost in the plethora of shiny gadgets and fancy equipment. Here’s the thing: as a beginner, you don’t need every tool in the store. Instead, focus on essential garden tools that will get you started on the right foot. In this article, we’ll explore the key items every new gardener should have in their shed to ensure a fruitful gardening journey.

The Basics: Hand Tools

Every gardener’s journey starts small, and hand tools are your best friends. Tools like trowels, pruners, and hand rakes may seem simple, but they are indispensable. For instance, a sturdy trowel helps in digging holes for planting and transplanting young seedlings. Just think back to that time when you tried to use a kitchen spoon to dig in the dirt—frustrating, right?

Hand pruners, often called bypass pruners, are essential for trimming and shaping your plants. They make clean cuts that help prevent damage. Picture this: you’ve grown a beautiful rose bush, but without proper pruning, it risks becoming leggy and unsightly. A good pair of pruners keeps your plants healthy and thriving.

Weeding Made Easy

No one enjoys the back-breaking job of weeding, but it’s a necessary chore. A quality weeder can make this task more manageable. A traditional hand weeder has a forked end that allows you to dig deep and remove pesky roots. Here’s a story for you: I once battled with a stubborn patch of dandelions for weeks until I discovered my trusty weeder. With a simple flick of the wrist, those roots came out easily, and my garden flourished.

Consider a hoe as well, particularly for larger areas. The long handle allows you to reach further without straining your back. Plus, using a hoe is somewhat therapeutic—watching the weeds disappear and your garden come to life gives a rewarding sense of achievement.

Soil and Fertilization Tools

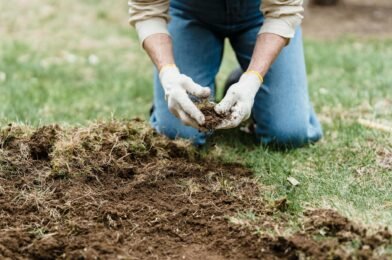
Healthy plants start with healthy soil. A good soil fork or spade is crucial for turning and aerating the earth. Imagine it’s spring, and you’ve got big plans for your vegetable garden. Your spade allows you to mix compost into the soil, making it rich and fertile. Without it, you’re merely hoping your plants will thrive.

Furthermore, having a sturdy garden rake helps level and smooth the soil. It’s an everyday tool that often gets overlooked but can mean the difference between an organized garden bed and a chaotic patch of earth. When you think about it, wouldn’t you want your plants to grow in a well-tended space?

Watering Solutions

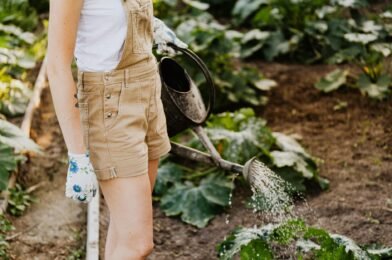
Every garden needs water, and having the right watering tools is crucial. A watering can might seem basic, but it’s incredibly effective for gently watering new seedlings or plants in pots. Choose one with a long spout to reach those tricky spots. Picture yourself watering your freshly planted seeds on a sunny Saturday morning. That simple act can spark joy and create a bond between you and your garden.

For larger areas, consider investing in a hose with a sprayer attachment. This tool allows you to cover extensive ground efficiently. Just imagine: you’re enjoying a warm evening, chatting with friends while effortlessly watering your flower beds. Now that’s a perfect way to unwind!

Safety and Maintenance Gear

Lastly, let’s not forget safety. Gardening can be a dirty business—literally! A good pair of gardening gloves protects your hands from blisters and dirt. Opt for gloves that offer both durability and flexibility. One day, you might find yourself pulling prickly weeds, and those gloves will be your best ally.

Additionally, tools require maintenance, so having a small tool kit for basic repairs will come in handy. For example, a simple screwdriver can tighten loose screws on your hand tools. Neglecting maintenance can lead to bigger issues, and nobody wants a broken trowel mid-planting!

Conclusion: Start Your Gardening Journey

There you have it—the essential garden tools every beginner needs in their shed. These tools will not only help you cultivate your garden but also ignite a passion that keeps you returning to the soil. What’s your favorite gardening tool? Or perhaps you have a story of your first garden experience? Share your thoughts in the comments below! Happy gardening!

Fall Gardening Tasks to Set Up a Great Next Season

Fall Gardening Tasks to Set Up a Great Next Season

As the vibrant greens of summer fade into the warm hues of fall, many gardeners face the temptation to put away their tools and call it a season. But here’s the thing: fall is not just about harvesting the last of the crops. It’s a crucial period that can set the stage for a flourishing garden come spring. Have you ever wondered why some gardens bloom with vigor while others struggle to regain their former glory? The answer often lies in the actions taken during the fall months.

Imagine walking through a neighbor’s garden, where flowers burst forth in riotous colors, and vegetables seem to thrive effortlessly. You might find yourself asking: “What is their secret?” The truth is, dedicated fall gardening tasks can make a world of difference. From soil preparation to planting cover crops, these tasks not only maintain your garden’s health but also enhance its productivity for the next growing season. Ready to dig in? Let’s explore the essential fall gardening tasks that can help set you up for a successful spring.

1. Clean Up the Garden Beds

One of the first steps in preparing your garden for the cold months ahead is cleaning up your garden beds. This involves removing dead plants, weeds, and debris, which can harbor pests and diseases. Take a moment to reminisce about that flourishing tomato plant that gave you so many fruits this summer. Now, as its remnants lie decaying, you realize it’s time to say goodbye. 

Cleaning the garden also allows you to assess your beds for any necessary repairs or amendments. Did you notice any soil erosion in certain areas? Maybe some plants didn’t thrive as expected? These observations are golden opportunities for improvement. Rake away the debris, and consider adding a layer of compost to enrich the soil. At the end of the day, a tidy garden bed is the perfect starting point for your spring aspirations.

2. Prepare the Soil for Next Season

Let’s talk about the backbone of any garden: the soil. Healthy soil is rich in nutrients and has good structure, which allows plants to thrive. Fall is the ideal time to give your soil the attention it deserves. Why? Because soil amendments made in the fall have time to break down and integrate before planting begins in spring.

Consider conducting a soil test to determine its pH and nutrient levels. Based on the results, you can add lime, sulfur, or other soil amendments. For those who may not have tackled this before, adding organic matter—like well-rotted manure or compost—can vastly improve soil fertility. Picture your plants getting a nutrient boost the moment you plant them in spring. It’s remarkable how a little preparation can lead to abundant harvests.

3. Plant Cover Crops

Have you ever heard of cover crops? If not, you’re in for a treat. These crops, planted in the fall, serve a dual purpose: they protect your soil and improve its fertility. Popular choices include clover, rye, and vetch. They act like a natural blanket, preventing erosion and suppressing weeds during the colder months. Imagine putting your garden to bed with a lush green cover that will nourish it throughout winter.

As the cover crops grow, they work their magic by fixing nitrogen in the soil and improving its structure. In the spring, simply cut them back and incorporate them into the soil. It’s one of those little-known secrets that can dramatically enhance the health of your garden. So, after the last leaf falls, don’t just sit back—plant cover crops and let nature do the heavy lifting.

4. Mulch for Protection

As temperatures drop, mulching becomes a gardener’s best friend. A proper layer of mulch can protect your plants from harsh winter conditions, regulate soil temperature, and retain moisture. Think about those chilly nights when frost threatens your tender perennials. A thick layer of organic mulch, like shredded leaves or straw, can act as insulation, shielding the roots and preserving soil life.

Applying mulch isn’t merely a chore; it’s an art. The key is to apply it at the right time—before the ground freezes. You’ll not only be extending the growing season for certain plants but also making your spring tasks easier. Less weeding? Count me in! So gather those autumn leaves and spread them generously across your garden beds.

5. Plan for Next Year’s Garden

What’s next for your garden? As you put your garden to rest, it’s the perfect time to dream about next year’s layout. Grab a notebook and jot down what worked and what didn’t. Maybe those zucchinis took over the world—again! Or perhaps you finally nailed that carrot-growing technique. Evaluating your successes and failures is key to future growth.

Consider rotating your crops to prevent soil depletion and pest buildup. For instance, if you grew tomatoes in a certain area this year, think about planting legumes next season. They will replenish the nitrogen in the soil and keep your garden thriving. So, as the leaves fall, let your ideas for next year’s garden rise. Planning now will undoubtedly save you time and effort when spring arrives.

6. Take Inventory of Your Tools and Supplies

Lastly, let’s not overlook your gardening tools. After a bustling season, they deserve some TLC too. Have you ever reached for a tool only to find it rusty or broken? That reality can be frustrating when there’s work to be done. Fall is the perfect time to take inventory of your tools, clean them up, and make any necessary replacements.

Storing your tools properly can extend their life significantly. After cleaning, consider oiling moving parts, sharpening blades, and storing them in a dry place to prevent rust. This not only prepares you for the next season but also enhances your gardening experience. Good tools make all the difference, creating a seamless flow from idea to execution. So, as you clean and prepare, remember: a gardener is only as good as their tools.

Fall gardening tasks can feel like a lot of work, but the rewards are well worth the effort. Your dedicated actions now will lead to a flourishing garden when spring rolls around. So, what will you choose to focus on first? Cleaning, soil prep, or perhaps planting cover crops? Share your fall gardening plans below and let’s inspire each other for the next growing season!

Preparing Your Garden for Winter: A Complete Guide

Preparing Your Garden for Winter: A Complete Guide

As the days grow shorter and the air becomes crisper, many gardeners face a pivotal question: how can I ensure my garden thrives again come spring? Winter might seem like a time for gardens to hibernate, but in reality, it’s the perfect opportunity to lay the groundwork for a vibrant growing season ahead. With a few essential steps and some thoughtful preparation, you can protect your plants and soil from harsh winter conditions.

Picture this: the first frost arrives and your vibrant greens begin to wilt. It’s a sobering moment that reminds us that preparation is not merely an option; it’s a necessity. The truth is, winter can be unforgiving to unprepared gardens. However, with a proactive approach, you can create a sanctuary for your plants that will allow them to emerge revitalized and robust when the thaw comes. This guide will navigate you through the essential steps to prepare your garden for winter.

Assessing Your Garden’s Needs

Before diving into winter preparations, take a moment to assess your garden’s unique needs. Walk through your space and consider factors such as the types of plants you have and their specific hardiness zones. For instance, perennials like astilbes and peonies can often survive winter with minimal intervention, while more delicate annuals might require your assistance to survive the cold. By understanding what you have in your garden, you can tailor your winter preparation plan to fit their needs.

Here’s the thing: many gardeners overlook the importance of cleaning up their garden beds before winter sets in. Allowing dead plant matter to accumulate can attract pests and diseases that will linger long after the first snow. A neighbor of mine learned this lesson the hard way when she discovered that her beloved dahlias succumbed to fungal infections after a careless approach to fall cleanup. A simple cleanup and proper mulching could have saved her plants. So, what’s holding you back? Grab those garden gloves and get to work!

Properly Pruning Your Plants

Pruning may not be the most thrilling aspect of gardening, but it’s essential for winter preparation. Think of it as giving your plants a much-needed trim before their long winter’s nap. This practice helps to remove any dead or diseased branches that could compromise the plant’s health. Moreover, it encourages healthy growth in the spring. For example, if you’ve got rose bushes in your garden, pruning them back in late fall can help minimize winter damage and ensure robust blooms come summer.

When pruning, remember that timing is crucial. Late fall is typically ideal for many shrubs and trees, as they have gone dormant. However, don’t rush outdoors too soon; waiting until after the leaves have fallen is key. As you prune, take care not to cut too much—balance is vital. Aim for a clean cut at a 45-degree angle just above a bud. Your plants will thank you for it come spring!

Soil Care: The Unsung Hero

While we often focus on the visible parts of our gardens, let’s not forget about the soil. Healthy soil is the foundation of a thriving garden, and winter offers an excellent time to nurture it. If your garden soil is low in nutrients, incorporating organic matter like compost or well-rotted manure can significantly boost its health. This addition helps retain moisture and provides essential nutrients, creating a lush landscape for your plants’ roots to thrive.

One of my gardening friends swears by the benefits of covering her beds with a protective layer of mulch. This not only prevents soil erosion but also insulates the ground against freezing temperatures. When spring rolls around, she finds that her soil warms up faster, which jumpstarts her planting season. Imagine walking out to a garden that’s already a step ahead! The benefits of caring for your soil during winter cannot be overstated. Are you ready to give your garden the gift of rich, nurturing soil?

Choosing the Right Winter Cover

Covering your garden for the winter may sound straightforward, yet it’s a task that requires careful consideration. Depending on your climate and the plants you’re protecting, different coverings will serve different purposes. For example, a breathable fabric like frost cloth can help insulate tender plants, while a more rigid structure like a cold frame might be necessary for your vegetable garden.

A friend of mine uses old sheets and blankets to shield her precious seedlings from harsh winds and frigid temperatures. Surprisingly, these simple materials can effectively trap heat while preventing frost damage. Just be sure to remove the covers on sunny days to allow for airflow! Think about your own garden: which plants need extra protection? A little planning now can set the stage for a thriving garden season.

Final Touches: Fertilizing and Watering

As winter approaches, many gardeners assume it’s time to halt all watering and fertilizing. However, understanding your garden’s specific water needs is essential. Soil moisture plays a critical role in plant health. If you’re in an area with little winter precipitation, a deep watering before the ground freezes can go a long way. This ensures that your plants have enough moisture to see them through the chill.

Likewise, fertilizing your garden during this time can be beneficial, but it’s essential to choose the right fertilizer. A slow-release, organic option is typically best. Adding nutrients now allows your plants to build strong root systems, which is crucial for a successful spring revival. Have you thought about how your plants will access nutrients in the cold? By making these final touches, you’re setting the stage for a flourishing garden when spring arrives.

As winter sets in, many of us dream of blossoming flowers and lush greenery. But the reality is, the journey to a beautiful garden begins long before the first buds appear. Taking the time to prepare your garden for winter can impact your success in the growing season to come. So, what will you do today to ensure your garden thrives through the winter months?

Share your winter preparation tips or ask questions below! Remember, every gardener has a unique story to tell, and your insights could inspire someone to create their best garden yet.

Summer Garden Care: Keeping Plants Alive in the Heat

Summer Garden Care: Keeping Plants Alive in the Heat

Picture this: You wake up one bright morning in August, and your garden looks like it’s been through a heatwave. Well, it has! With temperatures climbing, keeping your plants thriving requires a thoughtful approach. Did you know that many gardeners lose a significant portion of their plants during the summer months due to improper care? The truth is, summer gardening poses some unique challenges, but with the right strategies, your garden can be a lush oasis even in the scorching heat.

As summer sets in, it brings longer days and more sunlight, which can be both a blessing and a curse for our beloved greenery. Plants, like humans, face stress during extreme weather conditions. What most gardeners overlook is that the way we care for our plants during these hot months can determine their survival. That’s why understanding the essentials of summer garden care is crucial if you want your plants to flourish.

Watering Wisely: The Key to Survival

Have you ever heard of the “deep watering” technique? It’s a game-changer! Instead of light sprinklings throughout the week, aim for deep, thorough watering once or twice a week. This encourages plants to develop deeper root systems, making them more resilient against the heat. Picture a time when you watered your plants lightly every day; they likely wilted quickly under the sun. Here’s the thing: deep watering allows the moisture to penetrate the soil, providing sustenance even during the hottest days.

Let’s look at a real-life example. A neighbor of mine, an avid gardener, struggled with wilting tomato plants each summer. She switched to deep watering and saw a remarkable transformation. Her tomatoes thrived, producing juicy fruits throughout the season! So, before you grab that hose again, consider the depth of your watering strategy. You might be surprised by the results!

Mulching for Insulation

During summer, much like a cozy blanket on a chilly night, mulch acts as an insulator for your plants. It helps retain moisture in the soil, regulates temperature, and suppresses pesky weeds. But here’s a common question: how much mulch is too much? Ideally, a 2- to 3-inch layer around your plants should suffice. This ensures that moisture is locked in, but still allows the soil to breathe.

Imagine this scenario: you have a vibrant flower bed that seems to dry out within hours of watering. A friend of mine faced this issue until she decided to apply a layer of organic mulch. Suddenly, her flowers not only looked happier, but they also flourished despite the heat. At the end of the day, mulching is a simple yet effective way to keep your garden thriving during the summer months.

Choosing the Right Plants

Have you ever planted something simply because it looked beautiful, only to watch it struggle in the heat? The truth is, plant selection is crucial for successful summer gardening. Opt for heat-tolerant varieties like succulents, ornamental grasses, and native plants that are well-adapted to your region’s climate. These choices not only survive but often thrive in summer conditions.

For instance, a local garden center hosts a summer sale featuring drought-resistant plants. Many customers overlook them, assuming they aren’t as vibrant as traditional floral offerings. However, after attending a workshop on sustainable gardening, I learned that these plants can bring a splash of color without demanding too much water. Why not choose plants that can endure the heat while still enhancing the beauty of your garden?

Fertilizing: Less is More

During the heat of summer, plants may enter a state of dormancy where their growth slows down. This makes fertilization a delicate balance. Over-fertilizing during this time can lead to burnt roots and stressed plants. Trust me, it’s far better to under-fertilize than to risk damaging your plants. A slow-release fertilizer once at the beginning of summer can do wonders without overwhelming your greenery.

Consider a story shared by a fellow gardener who learned this lesson the hard way. Enthusiastic about promoting growth, he over-fertilized his garden, leading to scorched leaves and stunted plants. Since then, he follows a conservative approach, ensuring his plants get just enough nutrients without the risk of overload. Next time you’re reaching for that fertilizer, remember that moderation can lead to a more robust garden.

Pest Control in the Heat

Conclusion: Embrace the Summer Challenge

Spring Gardening Checklist: What to Do Every March and April

Spring Gardening Checklist: Essential Tasks for March and April

As the frost starts to melt away and the days grow longer, a sense of rejuvenation fills the air. Are you ready to embrace the beauty of spring? Gardening has a magical way of connecting us with nature, so why not kickstart the season with a well-organized checklist? March and April present the perfect opportunity to prepare your garden for a vibrant growing season. But where do you begin?

Transitioning from winter to spring can feel overwhelming, especially if you’re unsure of the tasks ahead. Fortunately, a clear checklist can make the process enjoyable rather than daunting. Whether you’re a seasoned gardener or a curious beginner, identifying what to focus on during these pivotal months is crucial for a flourishing garden. Let’s delve into the essential tasks you should prioritize this spring!

Assess Your Gardening Tools and Supplies

Before you even think of planting, take a moment to evaluate your gardening tools. When was the last time you sharpened your pruners or oiled your shears? Truth is, well-maintained tools can make all the difference in your gardening experience. As winter wanes, set aside a day to inventory your supplies. Check for any broken handles or rusty blades, and replace them accordingly.

Imagine trying to prune your roses with dull scissors—frustrating, right? Instead, invest some time in cleaning and organizing your tools. A tidy workspace not only boosts productivity but also helps you feel more connected to your gardening journey. Plus, have you ever noticed how a new pair of gardening gloves can lift your spirits? Treat yourself to a fresh pair, and feel the excitement build as you prepare for planting season!

Start Planning Your Garden Layout

Have you ever planted a garden only to realize you ran out of space for that gorgeous new heirloom tomato? Avoid the chaos of last-minute adjustments by mapping out your garden beds. Sketching your layout can help you visualize where each plant will thrive based on sunlight and spacing requirements. Think of it as creating a masterpiece, where every flower and vegetable has its place.

Consider incorporating companion planting in your layout. For example, planting basil near tomatoes can enhance growth and flavor. Plan your garden by grouping compatible plants together for a more fruitful harvest. With a clear layout, you not only maximize your space but also minimize the stress of planting. Plus, getting crafty with garden planning can be a fun family activity. Why not involve the kids and let them choose their favorite vegetables?

Prepare Your Soil for Planting

Healthy soil is the foundation of a thriving garden. Are you excited to dig in and get your hands dirty? Start by testing the pH of your soil. A simple soil test kit can reveal crucial information about your soil’s nutrient levels, guiding you in what amendments are needed. Adding organic matter, such as compost, can dramatically improve soil health, leading to more vigorous plant growth.

Once your soil is ready, till it gently to aerate and break up any compacted areas. This process not only prepares your garden beds but also allows any dormant seeds to germinate, giving your garden a head start. Remember the joy you felt when you first saw those green sprouts peeking through the earth? There’s nothing quite like it! Engage in this process mindfully, noticing how each scoop of soil transforms into something promising and vibrant.

Choose Your Seeds and Plants Wisely

The excitement of selecting seeds can be intoxicating! With numerous options available, choosing the right varieties can feel like a daunting task. However, this is where your planning pays off. Focus on plants suited for your climate and soil type. Consider native plants—they are often more resilient and require less maintenance.

Have you ever tried starting seeds indoors? This strategy can extend your growing season. Simply place your chosen seeds in seed trays a few weeks before the last frost date. As you watch them sprout, the anticipation of transplanting them into your garden will build. Plus, there’s a certain pride that comes from nurturing those tiny plants into flourishing adults. Whether you opt for seeds or starter plants, ensuring diversification can make your garden more resilient to pests and climate changes.

Plan for Pest and Weed Management

No gardener wants to face an infestation of pests or a weed invasion. So, why not take preventive measures? Every March and April is your chance to set up a plan for pest management. Companion planting, as previously mentioned, is one effective strategy. Additionally, introducing beneficial insects, like ladybugs, can naturally control unwanted pests. Have you ever watched a ladybug munch away at aphids? It’s a gardener’s dream!

It’s essential to stay proactive with weeds, too. Start by mulching around your plants to suppress weed growth. Organic mulch not only keeps the weeds at bay but also adds nutrients to the soil as it breaks down. The key is to remain vigilant. Regularly inspect your garden and remove any weeds before they take over. Preventing these issues early on can save you countless hours in the long run!

Timing Your Planting Schedule

Timing is everything when it comes to planting. When do you typically feel the surge of enthusiasm as spring approaches? While the end of March might feel like the perfect time to plant, it’s crucial to keep an eye on local weather forecasts. This will help you avoid the disappointment of late frost that could jeopardize your young plants.

Consider creating a simple calendar that outlines when to sow seeds indoors or when to transplant outdoors. Depending on your hardiness zone, you might be surprised to learn that some plants can be sown directly into the garden as early as mid-April. This is where knowing your zone becomes key. By planning ahead and timing your planting correctly, you can ensure a bountiful harvest.

Don’t Forget About Garden Aesthetics

Finally, let’s talk about the aesthetic appeal of your garden! Spring isn’t just about growing food; it’s also about creating a peaceful sanctuary. Have you thought about adding decorative elements, like a birdbath or garden trellis? These additions not only enhance the beauty of your space but also invite wildlife, enriching your garden’s ecosystem.

Consider incorporating a variety of colors and textures in your planting choices. Think about planting flowering perennials that will bloom throughout the season. From tulips to daisies, a vibrant flower bed can bring joy and tranquility to your outdoor space. Remember, gardens reflect our personalities. So, let your creativity shine through and design a garden that resonates with you on multiple levels.

Spring is a time for renewal and growth, so why not embark on this gardening journey? By following this spring gardening checklist, you can ensure that your garden thrives for months to come. What are your favorite spring gardening tasks? Share your thoughts or experiences in the comments below, and let’s celebrate the beauty of spring together!

Growing Roses for Beginners: Simple Secrets for Big Blooms

Growing Roses for Beginners: Simple Secrets for Big Blooms

Have you ever gazed longingly at a neighbor’s garden, captivated by the vibrant colors and enchanting fragrance of their roses? You’re not alone! Many aspiring gardeners dream of cultivating these timeless flowers but often feel overwhelmed by the thought. The truth is, growing roses can be surprisingly easy when you know a few simple secrets.

Imagine stepping outside, greeted by the delightful sight of blossoming roses in every hue imaginable. Sounds like paradise, right? Well, the good news is that you can create this scenario in your own backyard. With just a bit of guidance, you’ll soon discover that nurturing these beauties is not just rewarding, but also a fulfilling adventure.

Choosing the Right Rose Variety

Before you even touch the soil, let’s talk about one of the most critical steps in rose gardening: selecting the right variety. There are countless types of roses, each with its unique charm and growth requirements. For beginners, hybrid teas and floribundas are excellent choices as they are often hardier and easier to care for. Imagine the excitement of watching a hybrid tea bloom with its iconic single, large blooms that are perfect for cutting and displaying in your home!

Consider this: if you’re short on space, mini roses could be the perfect fit. These charming little plants thrive in containers and bring a pop of color to patios or balconies. A friend of mine recently planted a mini rose bush on her apartment balcony, and it sparked joy not just for her, but for all her neighbors who stopped to admire it. What roses are you thinking of growing?

Understanding Soil and Location

Now that you’ve chosen the perfect variety, let’s dig into the next crucial aspect: soil and location. Roses thrive in well-drained, nutrient-rich soil. Many gardeners make the mistake of planting in heavy clay or overly sandy soil, leading to poor growth. A soil test kit can help determine the pH and nutrient levels, allowing you to amend it accordingly.

Moreover, roses bask in the glory of sunlight. For optimal blooms, place your roses in a spot that receives at least six hours of sunlight each day. I remember when I planted my first rose bush in a shady corner; it struggled and barely produced any flowers. After moving it to a sunnier location, the transformation was astonishing! Suddenly, I was rewarded with lush, fragrant blooms. Have you assessed your garden’s sunlight exposure?

Watering Wisely

Watering might seem simple, but it’s essential for your rose garden’s success. Overwatering is often the biggest mistake beginners make. Roses prefer deep but infrequent watering. Ideally, give them about an inch of water each week, allowing the soil to dry out slightly between waterings. This practice encourages deep root growth, which is crucial for health and resilience.

A practical strategy is to water early in the morning. This not only helps reduce evaporation but also allows the leaves to dry quickly, minimizing the risk of fungal diseases. I recall the first summer I gardened—I watered in the evening, only to find my plants battling mildew. Trust me; morning watering makes a world of difference. What watering routine do you think would work best for your roses?

Fertilizing for Flourishing Blooms

To achieve those stunning blooms, fertilization is vital. Roses are heavy feeders, meaning they require plenty of nutrients to thrive and produce flowers generously. Using a balanced fertilizer specifically formulated for roses can significantly enhance their blooming capabilities. A slow-release fertilizer applied in spring will provide your plants with the nutrients they need to grow strong throughout the season.

But here’s the catch: over-fertilizing can be just as detrimental as under-fertilizing. A friend of mine, eager for abundant flowers, went a bit overboard with the fertilizer. The result? Beautiful foliage, but hardly any blooms! Finding the right balance is key. Pay attention to your plants, and they will guide you. What type of fertilizer do you currently use for your plants?

Pruning and Maintenance

Many beginners shy away from pruning, fearing they might harm their roses. However, pruning is crucial for healthy growth and vibrant blooms. Taking time in late winter or early spring to prune your roses will help shape the plants and encourage new growth. Focus on removing dead or weak stems, which allows the plant to direct its energy toward producing beautiful flowers.

I once met a seasoned gardener who taught me the importance of making clean cuts at a 45-degree angle, just above a bud. This technique improves airflow and reduces disease risk. Moreover, regular deadheading—removing spent blooms—promotes continuous blooming throughout the season. It’s a simple yet effective way to keep your garden looking fresh. Have you considered adding pruning to your gardening routine?

Protecting Your Roses from Pests and Diseases

As enchanting as roses are, they can attract pests and diseases. Aphids, spider mites, and powdery mildew can wreak havoc on your plants if you don’t stay vigilant. The first line of defense is to regularly inspect your roses. Spotting issues early can save your plants from further damage. If you notice pests, a gentle spray of water can dislodge them, or you might choose to introduce beneficial insects like ladybugs to your garden.

Additionally, maintaining good air circulation by spacing out your plants helps prevent diseases. My neighbor, for instance, faced a losing battle with powdery mildew until she realized that overcrowding was the culprit. Once she thinned out her roses, they flourished beautifully. What preventative measures do you take to protect your garden?

Enjoying the Fruits of Your Labor

Once you’ve laid the groundwork by selecting the right roses, nurturing them with care, and protecting them from pests, it’s time to sit back and enjoy the beauty you’ve created. Picture yourself sipping your morning coffee surrounded by the vibrant colors and intoxicating scents of your flourishing rose garden. It’s not just about growing flowers; it’s about cultivating a serene space that brings joy.

Consider picking your blooms and bringing them indoors. A vase filled with fresh roses can brighten up any room and fill your home with their delightful fragrance. It’s a wonderful way to enjoy the fruits of your labor while sharing the beauty with family and friends. So, are you ready to embark on your rose-growing journey?

With a bit of passion and these simple secrets, the rose garden of your dreams is within reach. Dive into the world of roses, and let your creativity blossom! Whether you’re a novice or a seasoned gardener, every rose nurtured adds beauty to the world. Do you have any questions or tips to share? Drop them in the comments below, and let’s cultivate this passion together!

Low-Maintenance Flowers Perfect for Lazy Gardeners

Low-Maintenance Flowers Perfect for Lazy Gardeners

Imagine stepping into your garden, greeted by a vibrant array of flowers, each blooming effortlessly. You don’t need to be a horticultural guru to achieve this; you just need the right plants. For those of us who appreciate the beauty of a garden but lack the time or energy for rigorous upkeep, low-maintenance flowers are a godsend. But what exactly makes these varieties easy to care for, and which ones are the best options?

Here’s the truth: gardening shouldn’t feel like a chore. With the right selection of flowers, you can enjoy a flourishing garden while spending minimal time on maintenance. Whether you’re a busy professional, a parent juggling multiple responsibilities, or simply someone who prefers to relax in their garden rather than toil away in it, there’s a beautiful solution waiting for you. Let’s dive into the world of low-maintenance flowers that will keep your garden looking spectacular without demanding too much from you.

1. Daylilies: Colorful Resilience

Daylilies are a favorite among lazy gardeners, and for good reason! These resilient perennials can flourish in a variety of soil conditions, thriving even in less-than-ideal environments. They come in an array of colors and sizes, making it easy to find the perfect match for your garden aesthetic. Planting them is a breeze—just dig a hole, place the roots in, and cover them with soil. Once established, daylilies can thrive with minimal watering and will provide a stunning display year after year.

Consider this scenario: a neighbor once shared how they planted daylilies in a neglected corner of their yard. With little effort, those flowers transformed that spot into a burst of color that stunned everyone who passed by. The best part? They hardly watered them after the initial growing season. Without a doubt, daylilies demonstrate that you can achieve striking results without dedicating your life to gardening.

2. Sedum: A Succulent Surprise

When it comes to low-maintenance plants, sedum deserves a top spot on your list. These hardy succulents thrive on neglect and can grow in poor soil and dry conditions. Available in various textures and colors, sedum can create stunning ground covers or vibrant container arrangements. The beauty of sedum is that it requires little water and virtually no fertilization, making them ideal for the gardener who prefers a hands-off approach.

Here’s the thing: I remember a friend who transformed her balcony into a breathtaking oasis using various sedum species. She didn’t have a green thumb, but with minimal effort and occasional watering, her balcony became the envy of the neighborhood. Sedum is a testament that even the busiest of lifestyles can yield beautiful floral displays without breaking a sweat.

3. Coneflowers: Nature’s Tough Beauty

Coneflowers, or echinacea, are not only stunning but also incredibly resilient. These perennial flowers can survive drought and do well in poor soil, making them a perfect choice for the lazy gardener. They bloom from early summer until fall, attracting butterflies and bees, which adds life to your garden. With a variety of vibrant colors available, these flowers are both pleasing to the eye and beneficial for the environment.

What most people miss is that coneflowers are also medicinal! A neighbor of mine once brewed a tea from their coneflower petals, claiming it helped to boost their immune system. The ease of growing these beauties combined with their practical uses makes them an excellent choice. You plant them once, and they continue to bloom year after year with little help from you.

4. Lavender: Aroma Meets Simplicity

If you’re looking to add both beauty and fragrance to your garden, lavender is the way to go. This perennial plant thrives in sunny spots and well-drained soil, requiring very little watering once established. The stunning purple flowers not only look beautiful but also attract pollinators like bees and butterflies, creating a lively garden ecosystem. Plus, lavender is known for its calming aroma, making it a lovely addition to any outdoor space.

Picture a summer evening spent in your garden, the air filled with the soothing scent of lavender. A friend of mine planted several lavender bushes in her backyard with almost no care. She told me that the neighbors complimented her for the lovely smell wafting through the air while she did nothing but enjoy her evenings outside. Lavender is a perfect example of how a little planning can lead to significant rewards without the effort.

5. Black-Eyed Susans: Cheerful and Carefree

Black-eyed Susans are often considered the classic low-maintenance flower. Their bright yellow petals and dark centers provide a cheerful pop of color to any garden. These hardy flowers thrive in various conditions and can easily adapt to poor soil and drought. Once established, they require minimal care and will self-seed, meaning you’ll enjoy their beauty for years without replanting.

Do you remember those carefree summers filled with wildflowers? That’s the vibe black-eyed Susans bring to any space. A family member of mine planted a patch of these flowers in her backyard, and they quickly became the highlight of her summer garden. They may be low-maintenance, but their vibrant charm can elevate the entire landscape without demanding you invest hours each week in upkeep.

Creating Your Low-Maintenance Garden

Integrating low-maintenance flowers into your garden is more than just choosing the right plants. It’s about envisioning a space that requires minimal effort while providing maximum beauty. Start by selecting a few varieties mentioned above, and consider grouping them based on their sun and water needs. This not only makes your garden more visually appealing but also simplifies your watering schedule.

Another essential tip is to prepare your garden well by improving soil drainage and mulch application. By doing this, you can minimize weeds and retain moisture, reducing the time spent tending to your garden. Think about adding decorative stones or gravel around your flowers; this not only creates a clean aesthetic but also helps with water retention. What could be easier?

In the end, low-maintenance flowers are perfect for those of us who want a stunning garden without the arduous work. Whether you choose daylilies, sedum, coneflowers, lavender, or black-eyed Susans, you can create a vibrant outdoor space with ease. So why not give these hardworking beauties a try? Comment below to share your favorite low-maintenance flowers or ask any questions you may have about starting your relaxing garden journey!

How to Grow Sunflowers From Seed to Bloom

How to Grow Sunflowers From Seed to Bloom: A Step-by-Step Guide

Imagine waking up to a backyard bursting with golden sunflowers, their cheerful faces turning toward the sun. Isn’t that a sight to behold? These vibrant flowers are not just stunning; they also attract pollinators and add a sprinkle of joy to any garden. But how do you move from the first tiny seed to a towering, blooming sunflower? The journey is not just rewarding; it’s also simpler than you might think!

What’s fascinating about sunflowers is their resilience. They can thrive in a variety of conditions and are known for growing quickly, often reaching impressive heights in just a few months. Whether you’re an experienced gardener or just starting your green-thumb journey, growing sunflowers is an enriching experience. Let’s explore the steps from planting seeds to enjoying their full bloom.

Choosing the Right Seeds and Variety

Before diving into the planting process, it’s essential to select the right seeds. With numerous sunflower varieties available, you have options ranging from the classic tall giants to charming dwarf types perfect for borders. For instance, the “Mammoth Grey Stripe” can grow up to 12 feet tall, while “Little Becka” reaches only about 18 inches. Here’s the deal: if you have limited space, opt for dwarf varieties. They’re not only beautiful but also manageable.

Additionally, consider your climate. Some sunflowers prefer cooler temperatures while others thrive in the heat. Make sure to check your local gardening center for seeds that suit your area. I remember my first gardening adventure—a mix of tall and dwarf sunflowers filled my yard, and it became a community favorite, thanks to its delightful variety and height differences!

Preparing the Soil for Planting

Strong roots lead to stunning blooms. The soil is where it all begins! Sunflowers flourish in well-drained, nutrient-rich soil with a pH of 6.0 to 7.5. Start by clearing the area of weeds and debris. A good rule of thumb is to loosen the soil to a depth of about 2 feet. This technique helps the roots grow deep and strong.

Adding organic matter, like compost, enhances soil fertility. You might consider a soil test to check nutrient levels, especially if you want the best possible blooms. When I prepared my garden bed, the transformation was incredible. Just a few adjustments in the soil quality led to an explosion of color and health in my sunflowers. It’s all about that initial preparation!

Planting Your Seeds

Now comes the fun part: planting! The best time to sow sunflower seeds is in late spring when the soil temperature reaches around 70°F (21°C). Space your seeds about 6 inches apart, and plant them at a depth of 1 to 2 inches. If you’re planting multiple rows, ensure each row is at least 2 feet apart to provide ample room for growth and sunlight.

Here’s a pro tip: planting in clusters can create a stunning visual impact. For example, when I planted groups of three seeds in a tight circle, the resulting blooms were a breathtaking sight, resembling a radiant sun. Remember to water your seeds gently after planting—they’ll need that hydration to kickstart germination!

Watering and Care for Healthy Growth

Watering is crucial in the early stages of growth. After planting, keep the soil consistently moist but not soggy. As your sunflowers grow, they’ll need about 1 to 1.5 inches of water each week. What’s your watering strategy? I’ve found that an early morning watering routine allows the plants to soak up moisture before the heat of the day.

In addition to watering, monitor for pests like aphids and caterpillars. If you notice any invaders, treating them with a mild soap solution is often effective. One summer, I discovered a small colony of aphids on my sunflowers, and a simple spray saved the day! Regularly inspecting your plants can keep them healthy and vibrant.

Supporting Growth and Preventing Fall

As your sunflowers begin to reach for the sky, they may require some support, especially the taller varieties. Using stakes can help prevent them from leaning or falling over during windy weather. It’s a small step that can make a significant difference in keeping your blooms upright and healthy.

Additionally, consider mulching around the base of the plants. Mulch helps retain moisture, suppress weeds, and regulate soil temperature. I remember a particularly windy season when my sunflowers stood tall, thanks to the extra care I took with staking and mulching. They not only survived but thrived!

Harvesting and Enjoying the Blooms

After weeks of nurturing, the moment of truth arrives—the blooming! Sunflowers typically bloom about 70 to 100 days after planting, depending on the variety. You’ll know they’re ready when the petals are fully open and the backs of the heads turn yellow. If you plan to harvest seeds, wait until the backs of the heads are brown and dry.

When it’s time for harvesting, use sharp pruners and cut the flowers early in the morning. You can arrange them in a beautiful vase or dry them for seeds. I remember the joy of collecting seeds from my first sunflower harvest. It felt like a celebration of nature’s beauty and a promise of more blooms in the future.

Creating a Sunflower Garden Experience

Why not invite friends and family to share in the sunflower experience? Consider hosting a sunflower planting day or a harvest party. Kids especially love the excitement of planting seeds and watching them grow. Plus, a sunflower garden can become a wonderful backdrop for photos and memories.

At the end of the day, sunflowers are more than just flowers; they symbolize happiness and positivity. So, gather your loved ones, get your hands dirty, and enjoy the simple pleasures of gardening together. What more could you ask for?

In a world filled with challenges, growing sunflowers offers a slice of joy and beauty. So, are you ready to embark on this sunflower journey? I’d love to hear about your experiences growing these delightful flowers. Share your thoughts in the comments below or let me know if you have any questions!

Best Flowers to Grow for a Colorful Garden All Year

Best Flowers to Grow for a Colorful Garden All Year

Have you ever stepped into a garden bursting with vibrant colors and fragrant blooms, only to feel an overwhelming sense of joy? Imagine having that kaleidoscope of nature’s beauty right in your backyard, all year long. The truth is, with careful planning and a bit of know-how, you can cultivate flowers that not only thrive in every season but also transform your outdoor space into a stunning masterpiece.

What most people miss when planting their garden is understanding the importance of seasonal variety. It’s not just about the flowers you choose, but also about when they bloom. While spring is often associated with vibrant colors, fall and winter can surprise you with their own unique beauty. Let’s explore some of the best flowers to grow in your garden to ensure it remains a colorful sanctuary throughout the year.

Spring Blooms: Welcoming the Season

Spring is the season of rebirth, and the flowers that herald its arrival can infuse your garden with a fresh burst of color. Tulips, with their striking array of hues, can be found in nearly every color imaginable. Plant them in clumps for a breathtaking display. I remember the first time I planted tulips; watching them emerge from the soil felt like witnessing a miracle. Adding daffodils to the mix creates a cheerful contrast, their sunny yellow heads bobbing in the breeze.

Another spring favorite is the hyacinth. With their intoxicating scent and vibrant colors, these flowers are not just pretty but also fragrant. Imagine walking through your garden and being enveloped by their delightful aroma. To make the most of your spring garden, consider planting a mix of these flowers. Your spring garden can become a symphony of colors and scents that beckons you outdoors.

Summer Splendor: A Fiesta of Color

As the summer sun blazes, it inspires a riot of colors in the garden. Sunflowers stand tall, their cheerful faces turned toward the sun, creating an uplifting atmosphere. They’re easy to grow and can reach impressive heights. One summer, I planted a row of sunflowers that seemed to dance in the wind, their golden petals a dazzling sight against the blue sky.

Also, consider incorporating zinnias into your summer garden. They are hardy, drought-resistant, and available in an astonishing array of colors. What’s more, they attract butterflies and bees, bringing life to your garden. A mix of sunflowers and zinnias can create a vibrant and dynamic summer landscape that beckons you to relax in its beauty.

Autumn Charms: Embracing the Change

As summer fades into fall, your garden doesn’t have to lose its charm. Instead, it’s a time to showcase flowers that embrace the warm tones of autumn. Asters are perfect for this season, producing star-shaped blooms in shades of purple and pink. They not only add color but also extend the blooming season into the cooler months. I once planted asters alongside some goldenrod, and the combination illuminated my garden like a sunset.

Chrysanthemums, or mums, are another autumn staple. Available in a variety of shapes and colors, they are the quintessential fall flower. Their durability and longevity mean they can withstand cooler temperatures while still putting on a colorful display. Try mixing different varieties to create a layered look that complements the changing leaves of the trees.

Winter Wonders: The Hidden Gems

Winter may seem like a barren time for gardens, but there are flowers that can defy the cold and bring cheer to the bleakest months. Pansies, for example, are hardy little flowers that can bloom in the winter if planted correctly. With their charming faces, they can bring a touch of color to the winter landscape. I’ve had pansies survive in my garden, popping up even through the snow, reminding me that spring will come again.

Cyclamen is another winter gem. Their beautiful pink and white flowers combined with heart-shaped leaves make them perfect for winter gardens. These flowers thrive in mild winter climates and can bloom well into early spring, ensuring your garden remains vibrant during the colder months.

Mixing and Matching: The Art of Flower Combinations

Creating a colorful garden year-round isn’t just about choosing individual flowers; it’s also about how you combine them. Layering flowers with different heights, colors, and blooming seasons can create visual interest. For instance, pairing tulips and daffodils in spring can offer a beautiful contrast, while zinnias and sunflowers can create a lively summer scene.

Don’t forget about foliage too! Incorporating plants with varying textures and shades of green will enhance the overall aesthetic of your garden. Think about how your flowers will interact with one another, and plan your combinations carefully. A well-thought-out arrangement can make your garden a feast for the senses.

At the end of the day, growing flowers year-round is about passion and patience. What are some of your favorite flowers to grow? Have you had any memorable experiences in your garden that you’d like to share? A colorful garden awaits you, filled with blooms that tell your unique story.

Embrace the beauty of flowers throughout the seasons, and let your garden become a canvas of color and life. Whether you’re a seasoned gardener or just starting, there’s always a new flower to discover and grow. Share your thoughts in the comments below, and let’s celebrate the joy flowers bring to our lives!

How to Deal With Slugs in Your Garden Naturally

How to Deal With Slugs in Your Garden Naturally

Picture this: you’ve spent hours tending to your plants, nurturing them with love and care, only to discover a sad, slimy trail leading to devastation. Yes, those pesky slugs have invaded your garden! While they may seem harmless with their gooey exterior, these little marauders can wreak havoc on your beloved flowers and vegetables. So, how do you protect your garden without resorting to harsh chemicals? Let’s explore some effective natural methods to tackle this common garden problem.

Many gardeners face the slug dilemma at one point or another. Surprisingly, slugs are more than just a nuisance; they can devour entire leaves of tender plants overnight, leaving behind a trail of destruction. Before you start panicking, remember that nature offers a range of solutions to deter these pests. Not only will these methods help keep your garden healthy, but they’ll also promote a thriving ecosystem. Are you ready to reclaim your garden from these slimy invaders?

Understanding Slug Behavior

To effectively deal with slugs, it’s crucial to understand their habits. Slugs are nocturnal creatures, meaning they love to come out after dark, munching on your plants under the cover of night. The truth is, they thrive in moist environments, especially after rain or heavy watering. So, if you notice an uptick in slug activity, it might just be the weather helping them out. Have you ever wondered why some gardens seem to attract slugs more than others? It often comes down to moisture and shelter. Mulch, dense foliage, and debris can create the perfect slug habitat.

Consider a neighbor who once faced a significant slug problem in their vegetable garden. After researching slug behavior, they discovered that watering their plants early in the morning, rather than in the evening, significantly reduced moisture levels overnight. This simple change made their garden less inviting to slugs. Understanding these pests can be the first step in creating a slug-free environment!

Natural Repellents: What Works?

When it comes to natural slug repellents, several options can discourage them without causing harm to your garden. One of the most effective methods is using barriers made from materials like copper. When slugs come into contact with copper, it creates a reaction that they find uncomfortable, prompting them to turn away. You can easily create a copper barrier by using copper tape around your garden beds or planters. Have you ever seen how they behave when they encounter copper? It’s quite fascinating!

Another natural repellent involves using diatomaceous earth. This natural powder, made from crushed sea creatures, acts as a desiccant. When slugs crawl over it, they dry out and eventually die. Sprinkling a thin layer of diatomaceous earth around your plants can effectively keep these slimy pests at bay. Just remember to reapply after rain or watering, as moisture diminishes its effectiveness.

Companion Planting: A Strategic Approach

One of the lesser-known strategies for managing slugs is companion planting. Certain plants can repel slugs and protect your more vulnerable crops. For example, planting sage, rosemary, or garlic alongside your vegetables can create a natural deterrent. These herbs emit scents that slugs find unappealing. Imagine planting a fragrant garden that not only smells good but also protects your tomatoes from being devoured!

One gardener I know had a beautiful tomato patch that was under constant siege from slugs. After learning about companion plants, they introduced garlic and sage around their tomatoes. Not only did the slugs stay away, but the entire garden flourished with the addition of these aromatic herbs. Companion planting isn’t just a smart way to deter pests—it’s also beneficial for your overall garden health.

Creating a Slug-Friendly Environment

While it might sound counterintuitive, creating a slug-friendly environment can actually help you manage their population. By providing natural predators, such as frogs, toads, and birds, you can help control slug numbers. Adding a small pond or water feature might attract these helpful creatures. Plus, they’ll feast on those pesky slugs, reducing their numbers significantly.

Think about it this way: by inviting natural predators into your garden, you’re taking a holistic approach to pest management. One gardener I know even set up a small water source with rocks for frogs to hide under. The result? A much healthier garden with fewer slugs and thriving plants. Are you ready to invite nature’s helpers into your space?

Simple Traps You Can Make

If you’re dealing with a significant slug problem, consider setting up traps. One of the simplest traps involves using a shallow dish filled with beer. Slugs are attracted to the scent of fermentation, and once they slide in, they won’t be able to escape. Another option is placing a bowl of soapy water at ground level, which will trap them once they jump in. These DIY solutions are not only effective but also easy to set up!

In fact, a friend of mine swears by the beer trap method. After filling a few dishes and placing them strategically around her garden, she was astonished to find almost a dozen slugs each morning. It’s a hands-on method that not only keeps slugs in check but also allows you to monitor their presence. Have you tried any traps before, or are you ready to give them a whirl?

Conclusion: A Slug-Free Garden Awaits!

Dealing with slugs doesn’t have to be a nightmare. By utilizing natural methods, understanding their behavior, and introducing companion plants, you can protect your garden effectively. Remember, the key is persistence and adapting your strategies based on what works best for your plants. Share your experiences and tips below—what’s worked for you? Let’s help each other cultivate beautiful, slug-free gardens!