How to Improve Garden Soil Without Chemical Fertilizers

How to Improve Garden Soil Without Chemical Fertilizers

The secret to a thriving garden lies not just in the plants you choose, but in the soil that nurtures them. Have you ever considered the impact that chemical fertilizers might have on your garden’s ecosystem? While these products can deliver quick results, they often lead to long-term soil degradation and can harm beneficial microbes. Here’s the truth: improving your garden soil can be achieved with natural methods that enhance fertility without relying on synthetic chemicals.

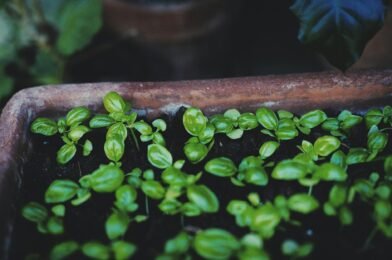
Imagine walking through a lush garden—vibrant flowers, robust vegetables, and the air filled with the scent of fresh earth. This beauty isn’t just a product of good seeds and diligent watering; it all starts with rich, healthy soil. But how do you create that optimal environment for your plants? The answer lies in understanding the components of soil health and utilizing organic techniques to improve its structure, fertility, and biodiversity.

Understanding Soil Composition

To improve your garden soil, it’s essential first to understand its basic components: minerals, organic matter, air, and water. Mineral content provides the structural framework of the soil, while organic matter, such as decomposed plants and animal waste, enriches it with nutrients. Here’s the thing: when you disrupt the balance with chemical fertilizers, you may inadvertently strip away this organic matter, leaving your soil barren and lifeless.

For example, consider the case of a gardener named Lisa. She inherited a garden that had been treated with chemical fertilizers for years. At first, she saw quick results, but over time, her plants struggled to thrive. After researching soil health, Lisa decided to implement organic practices. She began composting kitchen scraps and yard waste, significantly boosting the organic matter in her garden. This pivot not only revitalized her plants but also created a thriving ecosystem beneath the surface.

Add Organic Matter

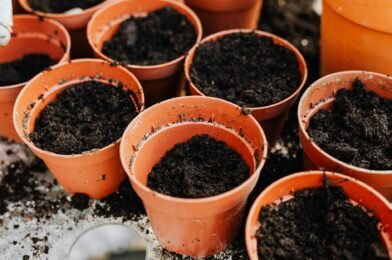
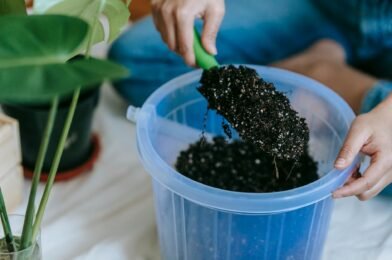
Organic matter is like a magic potion for your garden soil. It improves drainage, retains moisture, and provides essential nutrients that plants need to flourish. But what are the best sources? Compost, well-rotted manure, leaf mold, and green manures are all excellent choices. The beauty of composting is that it transforms your kitchen scraps and garden waste into a goldmine of nutrients, which you can then cycle back into your soil.

Picture this: every time you toss vegetable peels or coffee grounds into your compost bin, you’re making a deposit in your garden’s health bank. When you work this finished compost into your soil, you enrich it with a wealth of nutrients and beneficial microorganisms. At the end of the day, organic matter acts as a sponge, holding onto water and nutrients that your plants can access when needed.

Practice Crop Rotation

Crop rotation isn’t just a practical farming technique; it’s a powerful strategy for improving soil health. By changing the types of crops you grow in a specific area each year, you can prevent nutrient depletion and reduce the buildup of pests and diseases. This method not only enhances soil quality but also promotes biodiversity in your garden.

Take, for instance, a farmer named John who grows vegetables. He used to plant tomatoes in the same spot every year. However, after realizing that his soil was becoming less fertile over time, he decided to implement a crop rotation plan. The following season, he alternated tomatoes with legumes like beans and peas, which fix nitrogen in the soil. As a result, his tomato yield improved dramatically the next planting season—a testament to the power of thoughtful crop management!

Utilize Mulching Techniques

Mulching is another fantastic method to improve your garden soil without resorting to chemicals. Applying a layer of organic material—like straw, grass clippings, or shredded leaves—helps suppress weeds, retains moisture, and regulates soil temperature. Moreover, as that mulch breaks down, it enriches the soil with nutrients.

Encourage Natural Soil Life

Healthy soil is teeming with life. Earthworms, beneficial insects, and microorganisms all contribute to soil fertility and structure. But how can we encourage this thriving underground community? One effective way is to reduce soil disturbance. Practices like no-till gardening help maintain the soil structure and protect the organisms that live within it.

Conclusion

Small Balcony Garden Ideas Anyone Can Try

Small Balcony Garden Ideas Anyone Can Try

Have you ever looked out at your balcony and thought it was just a cramped space with no potential? You’re not alone! Many city dwellers grapple with the challenge of limited outdoor space, which often leads to a lost opportunity for greenery and life. But here’s the exciting part: even the smallest balconies can transform into lush gardens bursting with color and personality. Believe it or not, you can create a thriving balcony garden with just a bit of creativity and the right plants.

Picture this: coming home after a long day to a serene oasis right outside your door. The aroma of fresh herbs fills the air, and colorful blooms brighten your evenings. With the right small balcony garden ideas, you can turn that dream into reality. All you need is a willingness to explore new gardening techniques, a bit of planning, and a few containers to get started. So, are you ready to embrace your balcony as a vibrant extension of your home?

Vertical Gardening: Maximize Your Space

If space is tight, vertical gardening might be your best friend. Imagine a wall covered with cascading plants, bringing life to your balcony without taking up valuable floor space. Using shelves or wall-mounted planters, you can create a stunning visual effect. For example, a friend of mine transformed her narrow balcony by installing wooden trellises adorned with climbing plants like sweet peas and morning glories. The result? A breathtaking green backdrop that even attracted butterflies!

Another idea is to use hanging pots. They not only save space but also add depth to your garden. You can hang them in a staggered manner for a cascading effect or cluster them for a bold statement. Plus, consider planting herbs like basil, mint, and thyme in these containers. Not only do they look great, but they also provide fresh ingredients for your culinary adventures. What’s better than snipping fresh herbs right from your balcony for a home-cooked meal?

Container Choices: Think Outside the Box

When it comes to container gardening, your options are nearly endless. While traditional pots are a staple, innovative ideas can spark your creativity. Consider using recycled materials—old wooden crates, tin cans, or even an unused ladder repurposed into a plant stand. These unique choices not only add charm but also tell a story and reflect your personality.

Just last summer, I attended a neighborhood garden tour where one home featured an eclectic mix of colorful metal buckets filled with geraniums and petunias. It was a joyful explosion of color that made a lasting impression. This type of playful container gardening can make your balcony feel vibrant and inviting. Plus, don’t forget to choose containers that suit your plants’ needs. Drainage is key; ensure your containers have holes in the bottom to prevent waterlogging.

Choosing the Right Plants for Small Spaces

Not all plants are created equal when it comes to small balcony gardens. Some thrive in confined spaces while others might overwhelm your area. For a successful garden, think about compact varieties that won’t outgrow their containers. Herbs, dwarf vegetables, and flowering annuals are excellent choices. For instance, cherry tomatoes can flourish in pots if you choose smaller varieties like ‘Tiny Tim’ or ‘Patio Princess.’

Moreover, look for plants that bring beauty and function into one package. Ornamental peppers, for example, are not only colorful but can also add a spicy kick to your meals. My neighbor once planted a combo of lavender and rosemary, creating a fragrant haven that was both beautiful and useful for her cooking. As you select your plants, be mindful of their sunlight needs. Do you have a sunny or shady balcony? Understanding this will guide you in making the right choices.

Seasonal Gardening: Keep It Fresh Year-Round

What if I told you that you can enjoy your balcony garden in every season? The truth is, with some strategic planning, you can have blooming flowers, fresh vegetables, and fragrant herbs year-round. Start by selecting seasonal plants. In spring, plant pansies or snapdragons for vibrant color. During summer, let your tomatoes, peppers, and cucumbers shine. As fall approaches, consider planting kale or ornamental cabbages to keep the interest alive.

Don’t forget winter! Many people overlook the potential of winter gardening, but you can still grow hardy plants like winter jasmine or even certain types of herbs. A friend of mine keeps a small herb garden going through the winter using a simple mini greenhouse. This creative approach not only provides fresh ingredients for winter meals but also brightens up those dreary months. So, have you thought about how you can keep your garden thriving through every season?

Creating a Relaxing Atmosphere

At the end of a busy day, your balcony should be a sanctuary. Beyond just plants, think about creating a cozy atmosphere. Consider adding comfortable seating, soft lighting, and decorative elements like garden art or string lights. This will not only enhance the visual appeal but also make your space inviting for relaxation or entertaining friends. A simple folding chair and a small side table can work wonders.

For instance, last summer, I enjoyed several evenings on my friend’s balcony, complete with fairy lights and comfortable cushions. They had transformed a simple space into a charming retreat, making it the perfect spot for summer gatherings. Don’t underestimate the power of ambiance! By incorporating elements that reflect your style, you’ll create a personal oasis right outside your door.

Conclusion: Start Your Balcony Transformation Today!

Your small balcony is brimming with potential, waiting for you to unleash your creativity. By incorporating vertical gardening, choosing the right containers, and selecting plants that suit your space, you can create a garden that not only beautifies your home but also enriches your life. So why wait? Start planning your balcony garden today! Have you tried any of these ideas, or do you have your unique approach? Share your thoughts in the comments below!

How to Choose the Right Pot Size for Every Plant

How to Choose the Right Pot Size for Every Plant

Have you ever planted a beautiful flower only to watch its growth stunted by a pot that was either too small or, conversely, too large? It’s a frustrating reality for many gardeners, and understanding the importance of choosing the right pot size for each plant is crucial for successful container gardening. The truth is, the pot you select can greatly influence your plant’s health, growth rate, and overall aesthetic appeal. But how do you ensure you’re making the right choice?

Let’s explore the key factors to consider when selecting pot sizes, delve into specific plant needs, and help you make informed decisions that will keep your green companions thriving. Whether you’re a seasoned gardener looking to refresh your container setup or a beginner eager to avoid common pitfalls, this guide will equip you with the knowledge you need.

Understanding Plant Needs

Every plant has its own unique requirements when it comes to space, drainage, and root development. For instance, a small herb like basil thrives in a petite pot that allows its roots to breathe while maintaining adequate moisture. On the other hand, a larger plant such as a tomato requires a more significant amount of space for its roots to spread out and access nutrients effectively. Here’s the thing: if you underestimate the needs of your plants, you risk stunting their growth and possibly harming them in the long run.

Consider this scenario: a friend of mine decided to plant some succulents in tiny pots she found at a quirky art store. Initially, they looked adorable on her windowsill. However, after a few weeks, the plants started to droop. The lesson? Succulents need adequate room to grow; cramped conditions can lead to root rot. Assessing the specific growth patterns and space needs of each plant type is vital for a flourishing garden.

Choosing the Right Pot Size

When it comes to choosing the right pot size, a general rule of thumb is to go one size up from where the plant currently resides. For example, if your plant is in a 4-inch pot, consider moving it to a 6-inch pot. This allows enough room for the roots to spread without overwhelming the plant with excess space. But here’s the catch: too large a pot can lead to overwatering, as the soil may retain moisture much longer than the roots can utilize. Balance is key.

Additionally, consider the height of the pot. A deeper pot is beneficial for plants with extensive root systems, like carrots or lilies. Conversely, shallow-rooted plants, such as lettuce or herbs, will flourish in more shallow containers. It’s all about understanding your plant’s specific needs and providing the right environment for growth.

Drainage Matters

Let’s talk about drainage, an often-overlooked aspect of container gardening. No matter how perfect your pot is in size, poor drainage can lead to disastrous consequences. Plants like peace lilies enjoy moisture but can quickly suffer if their roots sit in soggy soil. Always ensure your pots have drainage holes, and elevate the pot slightly off the ground if necessary, allowing excess water to escape freely.

Don’t just trust the pot’s material; make sure it’s suitable for the plant. Terracotta pots, for example, are great for porousness and allow moisture to evaporate, thus preventing overwatering. When I started using terracotta pots for my indoor ferns, they flourished in ways I had never seen before. It was a game-changer. So, consider how your pot’s material affects moisture retention and drainage.

Visual Aesthetics and Space

While functionality is paramount, let’s not forget about aesthetics. The visual appeal of your garden matters, especially if it’s displayed prominently in your living space. Size does matter in this context as well. For example, a massive pot brimming with a single plant can create an eye-catching statement piece, while smaller pots can provide a lovely clustered effect. However, ensure that the size complements the space you’re working with. A giant planter in a cramped corner or a tiny pot on an expansive shelf can look out of place.

Your plant’s visual impact also depends on its growth habit. Tall, spindly plants like snake plants may require taller pots to balance their height, while bushier plants like petunias look lovely in wider, shallower pots. Think about how the size will enhance the overall aesthetic of your container garden.

Experimentation is Key

Container gardening is as much an art as it is a science, and sometimes the best way to figure out the right pot size is through experimentation. Start with a few different sizes and observe how your plants respond. Take notes on their growth patterns, changes in color, and overall health. You might be surprised by what works best for your specific conditions.

For instance, I once planted a small rubber tree in a pot that was one size too large. The plant struggled for months, and it wasn’t until I switched it to a smaller pot that it began to thrive. Observing and learning from each experience will not only enhance your gardening skills but also create a more engaging and interactive gardening journey.

Conclusion: Time to Get Planting!

Selecting the right pot size for every plant is not just about aesthetics; it’s crucial for their health and growth. By understanding plant needs, ensuring proper drainage, and considering visual appeal, you can create a thriving container garden. So, what pot sizes will you choose for your plants? Share your thoughts and experiences with pot sizes in the comments below or ask any questions you may have. Let’s cultivate a green thumb together!

Best Vegetables to Grow in Containers and Pots

Discover the Best Vegetables to Grow in Containers and Pots

Have you ever dreamed of a lush garden but felt limited by space? You’re not alone. Many urban dwellers and those with small yards are turning to container gardening as a viable solution. The good news is that you don’t have to compromise on variety or nutrition. You can grow a diverse range of vegetables right on your balcony or porch. But which vegetables truly thrive in pots? Let’s dive into some of the best options that will make your container garden flourish.

Container gardening offers an array of benefits. It’s not just about beautifying your space; it’s a practical way to cultivate fresh produce without the constraints of traditional gardening. The truth is, with the right selection of vegetables, you can enjoy a bountiful harvest even in a small area. But before you get started, let’s explore the best vegetables that are perfectly suited for containers, ensuring you have a productive and enjoyable gardening experience.

1. Tomatoes: The Container Superstar

When it comes to container gardening, tomatoes reign supreme. Why? They are versatile, delicious, and incredibly rewarding to grow. Imagine stepping outside and plucking a sun-ripened tomato for your salads or sandwiches. There are countless varieties, from cherry tomatoes to beefsteak, which means you can select based on your taste preferences. A real-life example: my neighbor, who grows Sweet 100 cherry tomatoes in hanging pots, enjoys a steady supply of delicious snacks throughout the summer. There’s nothing quite like the burst of flavor you get from homegrown tomatoes.

For best results, use a large pot—at least 5 gallons—to accommodate their root systems. Make sure to provide ample sunlight and water consistently to keep the plants healthy. With a little care, your container can produce an abundance of juicy tomatoes, making them one of the best vegetables to grow in pots.

2. Bell Peppers: Vibrant and Flavorful

Bell peppers are another fantastic choice for container gardening. They not only add a pop of color to your garden but also pack a nutritional punch. Just think about it: fresh, home-grown bell peppers in your stir-fry or salads bring unparalleled flavor and texture. A friend of mine swears by her container-grown yellow bell peppers, claiming they taste sweeter than any store-bought variety.

For growing bell peppers in containers, opt for pots that are at least 3 to 5 gallons in size. Plant them in nutrient-rich potting soil and place them in a sunny spot. They thrive in warm weather, so ensure that nighttime temperatures stay above 50°F. You’ll be thrilled with the results—vibrant, crunchy peppers that are just waiting to be harvested.

3. Leafy Greens: Quick and Easy Harvests

When you think of container gardening, don’t overlook leafy greens. Varieties like lettuce, spinach, and kale grow remarkably well in pots and can provide ongoing harvests throughout the seasons. What most people miss is that leafy greens are not only fast-growing but also packed with vitamins. Imagine munching on fresh kale in your smoothies or whipping up a vibrant salad with your homegrown lettuce.

For leafy greens, choose a shallow container that is at least 6 to 8 inches deep. This allows for adequate root development. A wonderful anecdote to illustrate this: during the pandemic, a friend turned her balcony into a mini garden filled with different types of lettuce. She enjoyed fresh salads multiple times a week, and it quickly became a delightful ritual amid the uncertainty of those times.

4. Radishes: The Fast Track Vegetable

Radishes are the ultimate fast-track vegetable for container gardening. They mature in as little as three weeks, making them a great choice for impatient gardeners. Here’s the thing: not only are they quick to grow, but they also have a unique crunch and a peppery flavor that can elevate your dishes.

Plant radishes in a container that is at least 12 inches deep. They require loose soil for their roots to expand properly. When you grow radishes, the excitement of watching them sprout is unparalleled. Imagine checking your pots and seeing those vibrant red tops peeking through the soil, signaling that they are ready to be harvested. It’s a delightful experience that will keep you motivated to continue your gardening journey.

5. Herbs: The Perfect Companion Plants

While technically not vegetables, herbs are essential for any container garden. They not only add flavor to your meals but also grow beautifully alongside your vegetable plants. Basil, parsley, and cilantro are top choices that flourish in pots. Imagine the aroma of fresh basil wafting through your kitchen as you prepare a homemade pasta sauce—it’s a game changer.

Growing herbs in containers is simple. Use pots with good drainage and choose a sunny location. To make the most of your herb garden, consider mixing different varieties in one pot. For instance, planting basil next to tomatoes can enhance flavor while maximizing your growing space. Plus, fresh herbs are the perfect garnish for your home-cooked meals, making every dish feel like a gourmet experience.

Conclusion: Start Your Container Garden Today!

Now that you’re equipped with knowledge about the best vegetables to grow in containers and pots, it’s time to dig in! Whether you have a spacious balcony or a quaint porch, you can create a thriving garden filled with delicious produce. Remember to choose the right pots, provide adequate water and sunlight, and enjoy the journey of nurturing your plants.

What vegetables are you most excited to grow in your container garden? Feel free to share your thoughts in the comments below! If you found this article helpful, don’t hesitate to share it with your gardening friends. Happy gardening!

Container Gardening for Beginners: Grow Anything on Your Patio

Container Gardening for Beginners: Grow Anything on Your Patio

Have you ever dreamed of having a lush garden but feel limited by space? Picture this: a vibrant array of flowers, fresh herbs, and even vegetables, all thriving on your small patio or balcony. It might sound like a fantasy, but container gardening makes it a reality. Whether you’re a busy professional, a city dweller, or simply someone looking to add a touch of greenery to your life, container gardening is the perfect solution.

Many people overlook the potential of container gardening, thinking it’s only for seasoned gardeners. The truth is, with just a few basic tools and some helpful tips, anyone can transform their outdoor space into a mini oasis. Have you ever wanted to enjoy fresh basil for your pasta or vibrant marigolds to brighten your day? With container gardening, you can grow a variety of plants, all within arm’s reach. Let’s explore how you can kickstart your container gardening journey!

Choosing the Right Container

The first step in your container gardening adventure is selecting the right pots or containers. You might think any old bucket will do, but the truth is, the type of container can significantly impact your plants’ growth. Consider materials like clay, plastic, or metal. Each has its advantages—clay pots offer breathability, while plastic containers are lightweight and versatile. Imagine a classic terracotta pot filled with vibrant geraniums; it adds character while providing great drainage.

When choosing size, larger containers are often better as they retain moisture and provide ample space for roots to grow. A common mistake beginners make is opting for too small of a pot. This can stunt plant growth. So, here’s the question: Do you want your plants to thrive or just survive? Aim for a container that’s at least 12 inches in diameter for most flowers and herbs. Remember, the aesthetic appeal is as important as functionality!

Soil and Drainage: The Foundation of Success

Many new gardeners underestimate the importance of soil quality. Using the right potting mix is crucial for the health of your plants. Garden soil is too dense and can lead to poor drainage in containers. Instead, opt for a high-quality potting mix, which is specifically designed to retain moisture yet allow for adequate drainage. Imagine trying to grow your precious tomatoes in mud; it just won’t work!

Don’t forget about drainage holes. Most containers should have them to prevent water from pooling at the bottom. If you’re using a non-draining container, like a decorative ceramic pot, consider placing a layer of gravel at the bottom to enhance drainage. At the end of the day, healthy roots lead to healthy plants—and healthy plants yield better produce or blooms. Have you checked if your containers have drainage holes yet?

Choosing the Right Plants

Now comes the exciting part: selecting the plants you want to grow. The options are truly endless! You can cultivate anything from hardy succulents and vibrant flowers to fresh herbs and even vegetables. If you’re a beginner, it’s best to start with easy-to-grow plants like basil, lettuce, or petunias. Picture yourself harvesting fresh basil for a homemade pesto—what a rewarding experience!

Consider your space and sunlight availability. Do you have a sunny patio that gets at least six hours of sunlight? Then tomatoes or peppers might thrive. On the other hand, if your patio is shaded, ferns or shade-loving flowers like impatiens will be more suitable. Here’s a fun fact: many herbs, like mint and parsley, can even thrive in partial shade! What kind of plants are you most excited to grow?

Watering Wisely

Watering your plants may seem straightforward, but there’s an art to it. Container plants often dry out faster than those in traditional gardens. Thus, regular monitoring of soil moisture is essential. A simple finger test—sticking your finger an inch into the soil—can help you determine if it’s time to water. If the soil feels dry at that depth, it’s time for a drink!

The key is to water thoroughly until you see excess water draining from the bottom of the pot. This ensures the roots are hydrated and prevents root rot. However, be cautious of over-watering, which can lead to fungal issues. Remember, just like you wouldn’t drown yourself in water, your plants don’t want to drown either. What watering methods have you tried in the past?

Fertilizing for Optimal Growth

Nutrients are vital for plant health, and container plants often deplete the soil of essential elements faster than plants in the ground. Incorporating a balanced, slow-release fertilizer into your potting mix is a fantastic way to ensure your plants receive consistent nourishment. It helps to think of fertilizer as food for your plants. Just like we need a balanced diet, so do they!

Some beginners might find it useful to use organic fertilizers, which are gentler on the plants and soil ecosystem. Additionally, liquid fertilizers applied every few weeks can provide an extra nutrient boost. Imagine seeing your plants flourish and bloom, all because you provided them with the right care. Are you ready to give your plants the nutritional support they need?

Maintaining Your Container Garden

Once your garden is planted and growing, maintenance is key to keeping it vibrant. Regularly check for pests and diseases, as containers can be prone to issues due to the confined space. Although some pests seem small, like aphids or spider mites, they can wreak havoc on your plants. If you spot trouble, don’t panic! A gentle wash with soap and water can often resolve minor infestations.

Incorporating companion planting can also be beneficial—not only does it deter pests, but it can enhance growth. For instance, planting marigolds alongside vegetables can deter harmful insects. And don’t forget about pruning! Regularly trimming back dead or wilted leaves not only improves aesthetics but encourages new growth. What’s your strategy for keeping your plants pest-free and thriving?

Harvesting and Enjoying Your Bounty

The thrill of container gardening culminates in the moment of harvest. Picture yourself plucking sun-ripened tomatoes or aromatic herbs from your patio garden. The satisfaction of enjoying fresh produce from your own efforts is unparalleled. Be sure to harvest at the right time—not too early, and not too late. For instance, herbs are best harvested in the morning after dew has dried but before the heat of the day sets in.

In summary, container gardening is an accessible and rewarding venture that opens up a world of possibilities, even in the tightest of spaces. From selecting the right containers to maintaining and harvesting your plants, every step is an opportunity to connect with nature and nourish your soul. So, what are you waiting for? Grab those pots, pick your plants, and start growing today! Feel free to share your progress or ask questions in the comments below. Happy gardening!

Growing Rosemary: From Cutting to Full Bush

Growing Rosemary: From Cutting to Full Bush

Have you ever wandered through a garden and been captivated by the fragrant aroma of rosemary? This versatile herb not only adds a burst of flavor to your favorite dishes but also boasts a plethora of health benefits. Interestingly, did you know that growing rosemary can be as simple as taking a cutting from an existing plant? That’s right! With a little patience and care, you can transform that small sprig into a lush bush that thrives in your garden or kitchen.

For many aspiring gardeners, rosemary represents the perfect blend of beauty and utility. While it may seem daunting at first, the process of cultivating rosemary is both rewarding and enjoyable. Whether you’re a seasoned horticulturist or just starting your journey, understanding the steps involved in growing rosemary from cuttings can elevate your gardening game. Grab your gardening gloves, and let’s dive into the fragrant world of rosemary!

Understanding Rosemary’s Characteristics

Before you embark on your rosemary-growing adventure, it’s essential to understand the characteristics of this hardy herb. Rosemary (Rosmarinus officinalis) is a perennial shrub native to the Mediterranean region, known for its needle-like leaves and woody stems. This herb flourishes in sunny environments, making it an excellent choice for outdoor gardens and indoor windowsills alike. The truth is, rosemary thrives with minimal care, which is a blessing for busy gardeners.

Have you ever noticed how rosemary can survive in harsh conditions? Its resilience stems from its ability to withstand drought, thanks to its deep root system. This means that, once established, it requires less water than many other herbs. This characteristic makes it a fantastic choice for those looking to create a low-maintenance garden. Understanding these traits will set the foundation for successfully growing your own rosemary bush.

How to Take Cuttings from an Existing Rosemary Plant

The process of growing rosemary from cuttings is surprisingly simple and satisfying. Start by locating a healthy, mature rosemary plant. Choose a stem that is around 4-6 inches long, preferably one that is softwood – meaning it’s still flexible but has started to mature. Using clean, sharp scissors, snip the cutting just below a leaf node. This node is vital, as it’s the area where roots will eventually develop.

After taking your cutting, remove any leaves from the bottom half. This step prevents rotting when the stem is placed in water or soil. If you look closely, you’ll notice small bumps where the leaves were—these are the future root zones! At this point, you can also dip the cutting in rooting hormone to promote faster root growth, although it’s not strictly necessary. Have you ever tried propagating other herbs? Rosemary cutting is a fantastic entry point!

Rooting Your Rosemary Cutting

Once you’ve prepared your cutting, it’s time to get it rooted. You can choose between two popular methods: water propagation or soil propagation. If you opt for water, place your cutting in a glass of water, ensuring that the leaf nodes are submerged but the leaves are not. Position the glass in a bright spot but away from direct sunlight. Change the water every few days to keep it fresh, and wait patiently for the roots to develop.

Alternatively, if you prefer soil propagation, fill a small pot with a well-draining potting mix and insert the cutting directly into the soil. Water the soil lightly and cover the pot with a plastic bag to create a mini greenhouse effect. This method encourages humidity, promoting faster root growth. Which method excites you more? Both are effective, but you might find one more convenient than the other.

Transplanting Your Rosemary Seedling

After a few weeks, you should notice roots developing from your cutting, especially if you’ve chosen the water method. It’s time for the exciting step of transplanting your rosemary seedling! Carefully remove the cutting from the glass or pot, taking care not to damage the delicate roots. If you’re planting in the ground, choose a sunny spot with well-draining soil. If using a pot, ensure it has drainage holes to prevent water accumulation.

When transplanting, dig a hole slightly larger than the root ball of your cutting and place it in. Backfill the soil around the seedling and gently press down to eliminate air pockets. Water the newly transplanted rosemary lightly to settle the soil. Here’s a quick tip: if you’re planting multiple rosemary bushes, space them about 2 feet apart. This spacing allows them to grow without crowding each other.

Care Tips for Growing Rosemary Bushes

Your journey from cutting to a full rosemary bush now begins in earnest. But what’s the key to ensuring your plant flourishes? Rosemary loves sunlight, so aim for at least 6-8 hours of direct sunlight each day. If you’re gardening indoors, consider rotating your pots for even sunlight distribution. Watering is crucial, but here’s the catch: rosemary prefers drier soil, so wait until the top inch of soil feels dry before watering again.

Another essential aspect of care is pruning. Pruning encourages bushier growth and prevents the plant from becoming leggy. As you notice new growth, carefully trim back a few inches of the stems, promoting denser foliage. And remember, rosemary can also benefit from occasional fertilization with a balanced fertilizer during the growing season. What specific growth tips have you found helpful in your gardening experience?

Harvesting and Using Your Rosemary

One of the most rewarding aspects of growing rosemary is, of course, the chance to use it in your cooking. Once your rosemary bush has matured, typically after about a year, you can start harvesting the leaves. It’s best to pick leaves in the morning when the essential oils are at their peak. Snip off sprigs as needed, and consider leaving enough foliage on the plant to ensure healthy growth.

When it comes to culinary uses, rosemary is incredibly versatile. You can chop fresh leaves to add to roasted meats, vegetables, and even bread. Or why not infuse olive oil with fresh rosemary for a fragrant dressing? The possibilities are endless! Additionally, rosemary has been known for its potential health benefits, from improving digestion to enhancing memory. What delicious dishes do you envision creating with your own rosemary harvest?

Growing rosemary from cutting to a full bush is not just a gardening project; it’s a journey filled with fragrance, flavor, and satisfaction. With the right care and commitment, you’ll cultivate not only a wonderful herb but also a connection to the joy of gardening. So, roll up those sleeves, and let your rosemary bush thrive! How will you start your rosemary adventure today? Share your thoughts below!

How to Grow Mint Without It Taking Over Your Garden

Mastering Mint: How to Grow It Without Taking Over Your Garden

Have you ever planted mint, only to find it spreading like wildfire and overtaking your garden? You’re not alone! Many gardeners find themselves in a battle with this fragrant herb, which can quickly go from a delightful addition to a garden nightmare. What if I told you that growing mint successfully without letting it run rampant is entirely possible? With the right strategies, you can enjoy fresh mint leaves without the chaos.

Mint is not only aromatic and flavorful, but it also offers numerous uses in the kitchen, from enhancing cocktails to elevating salads. However, the truth is, if not carefully managed, mint can become invasive. It spreads through vigorous runners, which is why many gardeners are wary of planting it. Let’s explore effective methods to cultivate mint while keeping its ambitious nature in check.

Choosing the Right Planting Method

One of the best ways to prevent mint from taking over your garden is by selecting the right planting method. Consider using containers as your first line of defense. A large pot or container allows you to control the roots, which can be particularly beneficial in preventing them from spreading into your garden beds. For instance, I once planted mint in a sizeable ceramic pot, ensuring it had adequate drainage. The result? A thriving mint plant that provided fresh leaves throughout the summer without invading my flower beds.

Alternatively, if you prefer to plant mint directly in your garden, create a designated space by using barriers. Burying a plastic or metal edging material about 12 inches deep around the mint’s planting area can effectively restrict its growth. This simple strategy can make all the difference in keeping your garden organized and preventing mint from becoming the dominant force.

Understanding Water and Soil Needs

Mint thrives in moist, well-drained soil. However, too much moisture can lead to root rot, which is something every gardener fears. When I first started growing mint, I learned this lesson the hard way. After overwatering my plants, I discovered that a well-draining mix was essential. The key here is balance; ensure you give your mint enough water without drowning it. A good rule of thumb is to check the soil regularly. If the top inch feels dry, it’s time to water.

Moreover, consider the type of soil you’re using. Mint prefers a slightly acidic to neutral pH level. A mixture of compost and garden soil can provide the nutrients necessary for healthy growth while also ensuring proper drainage. By understanding and catering to your mint plant’s needs, you’ll be better equipped to maintain a vibrant herb without letting it take over your plot.

Regular Pruning: Keeping Mint in Check

Pruning is an essential practice if you’re serious about controlling mint’s growth. By snipping back the tops of the plant regularly, you can encourage bushier growth and prevent it from getting leggy. Not to mention, pruning can help redirect the plant’s energy towards producing more flavorful leaves rather than spreading outwards. I often enjoy a refreshing mojito during summer, and I make it a habit to prune my mint before gathering the leaves. This not only gives me a denser plant but also keeps my garden looking tidy.

Another pruning tactic involves cutting back the plant by a third at the end of the growing season. This helps prepare it for winter and can prevent excessive growth the following year. Ultimately, regular trimming helps you enjoy mint’s delightful flavors while keeping it contained in your garden.

Companion Planting for Success

Companion planting can provide an additional layer of control over mint’s invasive tendencies. By strategically placing mint near certain plants, you can create a natural barrier. For example, marigolds are known for their ability to deter pests while also providing a beautiful splash of color. Planting them alongside mint can help manage its growth while attracting beneficial insects to your garden.

Furthermore, other herbs like basil or rosemary can also coexist with mint, as they have similar needs. This not only utilizes garden space efficiently but can also create a micro-ecosystem that lessens the risk of mint taking over. Have you ever considered how different plants can positively influence each other? The symbiotic relationships in gardening can often lead to more abundant harvests.

Harvesting Wisely

How you harvest mint also plays a role in controlling its spread. While it’s tempting to take large quantities for cooking, it’s better to harvest selectively. Aim to take only a few leaves from each stem, allowing the plant to continue growing robustly. Additionally, you might want to consider harvesting during the morning when the leaves are at their most flavorful and aromatic. This practice not only helps maintain the plant’s health but also prolongs your mint supply throughout the growing season.

Interestingly, mint can be dried or frozen for later use. If you find your mint bush thriving, this might be a great way to preserve its essence beyond the summer months. Just remember to leave enough foliage on the plant to encourage further growth.

Conclusion: Find Your Mint Balance

Growing mint can be a delightful experience, but it requires a thoughtful approach to prevent it from overpowering your garden. With the right planting methods, regular pruning, and companion planting, you can enjoy the benefits of mint without the chaos. So, what are you waiting for? Are you ready to cultivate a mint garden that won’t take over every inch of space? Share your thoughts below or ask any questions as you embark on your mint-growing journey!

Top 10 Herbs Every Beginner Gardener Should Grow

Top 10 Herbs Every Beginner Gardener Should Grow

Have you ever wanted to step outside your door and snip fresh herbs for dinner? Imagine the aroma of basil wafting through your kitchen or the bright, zingy flavor of homegrown cilantro accentuating your tacos. For beginner gardeners, starting an herb garden can be a rewarding experience that enhances your cooking, adds beauty to your home, and connects you to nature. But with so many options, where do you begin?

Truth is, not all herbs are created equal. Some are notoriously tricky to grow, while others thrive even in less-than-ideal conditions. In this guide, we’ll explore the top 10 herbs that even novice green thumbs can cultivate with ease. These herbs are versatile, flavorful, and perfect for any dish, not to mention they’ll give your garden a delightful touch of green. Let’s dig in!

Basil: The Culinary Favorite

Basil is arguably the most popular herb for home cooks, and for good reason. Its sweet, peppery flavor enhances pesto, salads, and various Italian dishes. Here’s the thing: basil is also incredibly easy to grow, whether in pots on your windowsill or directly in the garden bed. Just make sure it gets plenty of sunlight—at least six hours a day—and keep the soil consistently moist. When you prune the leaves, don’t be shy; regular trimming encourages bushier growth.

One summer, I decided to grow a few basil plants in my patio garden. I was amazed at how quickly they flourished! By mid-July, I had enough basil to whip up a large batch of homemade pesto, which I shared with friends. The joy of eating something you’ve nurtured yourself is unparalleled. Can you imagine the satisfaction of sharing your own culinary creations with loved ones?

Cilantro: The Versatile Herb

If you enjoy Mexican, Indian, or Asian cuisines, cilantro should be on your must-grow list. Known for its distinct flavor, cilantro can elevate salsas, curries, and salads. As an annual herb, it grows quickly and can be harvested multiple times throughout the season. The biggest challenge? Keeping it cool. Cilantro prefers cooler temperatures, so plant it in early spring or late summer to avoid the heat of midsummer.

I once had a neighbor who transformed her small balcony into a mini herb haven. She grew cilantro alongside tomatoes and peppers, creating a vibrant little ecosystem. The best part? She would often invite us over for homemade salsa that featured her fresh cilantro. Isn’t it amazing how one small plant can bring so much flavor and joy into your life?

Mint: The Refreshing Delight

Mint is a must-have for any herb garden. Whether you’re crafting refreshing mojitos or adding it to salads, this herb is a true showstopper. However, be cautious; mint spreads like wildfire. Plant it in a pot or a confined space to prevent it from overtaking your garden. Mint thrives in partial shade and enjoys moist soil, making it a great choice for beginners.

Last summer, I planted mint in a large container, and it became the pride of my garden. It not only flourished but also attracted pollinators, enhancing the beauty of my outdoor space. When you take a whiff of its invigorating aroma, you can’t help but feel rejuvenated. Have you ever used fresh mint in your drinks? The difference is simply astounding!

Chives: The Onion’s Cousin

Chives are often overlooked, yet they pack a flavorful punch. With their mild onion taste, chives add a subtle kick to salads, soups, and omelets. Plus, they’re perennial, meaning they return year after year with minimal effort. Chives thrive in sunny spots and well-draining soil, making them perfect for beginner gardeners looking for a low-maintenance herb.

A couple of years ago, I planted a small patch of chives in my garden. To my surprise, they popped up early in the spring, even when the rest of my garden was still waking up. The first time I sliced them into a creamy potato soup, I was hooked. Does the thought of growing something that enhances your meals excite you? It’s a small step toward becoming a confident gardener.

Rosemary: The Aromatic Staple

Rosemary is not only a culinary delight but also a stunning addition to any garden with its beautiful, needle-like leaves and vibrant flowers. This hardy perennial loves full sun and well-drained soil, making it a favorite among beginner gardeners. Plus, how satisfying is it to toss fresh rosemary into roasted meats or vegetables? The aroma alone is worth the effort.

When I first started growing rosemary, I planted it near my barbecue grill. Every time I fired up the grill, I would snip off a few sprigs to flavor my dishes. My friends always commented on the delicious aroma wafting from the grill, and I felt a sense of pride knowing it was all thanks to my herb garden. Have you thought about where you could incorporate rosemary in your meals?

Parsley: The Kitchen Workhorse

Often underestimated, parsley is a kitchen essential that deserves a spot in your garden. Not only is it a fantastic garnish, but it also brings a fresh flavor to many dishes. It grows well in both sunny and partially shaded areas, making it forgiving for new gardeners. You can also choose between flat-leaf and curly varieties, each offering a unique flair for your cooking.

I once attended a dinner party where the host used freshly chopped parsley in her salad. It made the dish pop visually and added that extra layer of flavor that made it unforgettable. With such versatility and ease of growth, how could you say no to adding parsley to your herb collection?

Thyme: The Flavorful Accent

Thyme is a versatile herb that can enhance everything from roasted meats to soups and stews. It thrives in full sun and is drought-resistant, making it perfect for beginner gardeners who may forget to water occasionally. Plus, thyme can be harvested throughout the growing season, which means you’ll have a steady supply of fresh flavor at your fingertips.

A friend of mine once shared a recipe for braised chicken with thyme that changed my culinary game forever. When I started growing thyme, I realized how easy it was to incorporate fresh herbs into my cooking. The flavors are remarkably more vibrant than dried alternatives. Have you ever thought about how fresh herbs could elevate your meals?

Oregano: The Italian Essential

If you love Italian cuisine, oregano should be on your radar. This hardy perennial requires little care and can be grown indoors or outdoors, making it the perfect addition for beginner gardeners. Oregano’s robust flavor makes it a staple for sauces, pizzas, and Mediterranean dishes. It thrives in sunny spots and well-drained soil, adding another layer of ease to its cultivation.

When I first started experimenting with homemade pizza, I always reached for the dried oregano. But then I decided to grow my own, and the flavor was next-level! I remember the first time I sprinkled fresh oregano on a pizza straight from my garden. The laughter and compliments from my friends made all the effort worthwhile. It’s that kind of joy I want you to experience as well!

Sage: The Earthy Herb

Sage is beloved for its earthy flavor, particularly in stuffing and roasted dishes. It prefers full sun and well-draining soil, making it a relatively low-maintenance herb. The leaves are soft and velvety, providing a beautiful contrast to other herbs in your garden. Sage can be harvested throughout the year, and it pairs wonderfully with hearty meals, making it a valuable addition to any kitchen.

I once attended a holiday gathering where the host used fresh sage in her stuffing. The aroma filled the kitchen and created a warm, inviting atmosphere. After that, I decided to grow my own sage, and it quickly became a cherished herb in my collection. The satisfaction of using something I nurtured myself to create delightful meals is a feeling like no other.

Conclusion: Your Herb Journey Awaits

Starting your herb garden can be an exciting adventure filled with flavor, creativity, and connection to nature. With these ten beginner-friendly herbs, you’ll be well on your way to enhancing your culinary experience while enjoying the beauty of gardening. Are you ready to dig in and cultivate your own flavorful oasis? Share your thoughts, questions, or experiences in the comments below, and let’s grow together!

Growing Basil Like a Pro: Simple Tips for Huge Harvests

Growing Basil Like a Pro: Simple Tips for Huge Harvests

Have you ever walked into a kitchen and been enveloped by the unmistakable aroma of fresh basil? That vibrant smell can transport you straight to a sunny Italian garden. But what if I told you that you, too, can cultivate this aromatic herb, enhancing your culinary adventures and green thumb at the same time? If you’re dreaming of bountiful basil harvests, the good news is that growing basil isn’t just for seasoned gardeners. It’s an accessible endeavor that can yield huge rewards.

Picture this: fresh basil leaves ready to be plucked right from your windowsill, inspiring you to craft delightful pesto or elevate your pasta dishes. The satisfaction of nurturing your own basil plant is unparalleled. But, here’s the thing—successful basil gardening requires more than just watering and waiting. What are the secrets to ensuring your basil thrives, producing leaves that are lush and fragrant? Let’s explore the essential tips for growing basil like a pro!

Choosing the Right Variety

When it comes to basil, the variety you choose can make a world of difference. While sweet basil is the classic choice for most recipes, there are many other types that can enhance your garden flavor profile. Thai basil, with its spicy notes and purple stems, is a great addition for Asian dishes, while lemon basil adds a refreshing twist to salads and soups. Have you ever tried cinnamon basil? Its distinct flavor can add a unique kick to your desserts.

Last summer, I decided to experiment by planting four different varieties of basil side by side. It was astonishing to see how distinct each plant was—not just in flavor but also in appearance. The sweet basil grew tall and lush, while the compact variety stayed shorter but equally robust. By diversifying my basil garden, I discovered new flavors that not only impressed my palate but also my friends. So, take a moment to consider what you want from your basil. The right variety can elevate your culinary game significantly.

Optimal Growing Conditions

Now that you’ve chosen your basil variety, let’s dive into the best growing conditions. Basil loves warmth—this herb thrives in temperatures between 70°F and 90°F. If you’re starting your plants indoors, placing them near a sunny window can make all the difference. Alternatively, a south-facing porch or garden bed will help your basil soak up all that vital sunlight. Have you ever noticed how some plants seem to stretch toward the light? That’s your basil’s way of saying, “I need more sun!”

Real-life gardening often presents challenges, though. Last year, I planted basil in a shady spot, hoping it would thrive. Unfortunately, the plants struggled, yielding only a handful of leaves. The lesson? Basil is not fond of shade. If you want to grow huge harvests, ensure your plants have access to at least six hours of sunlight daily. Consider using plant markers to remember which varieties you’re growing and where they flourish best. This small effort will pay off immensely!

Watering Wisely

Watering is a critical component of basil care, but the key is striking a balance. Overwatering can lead to root rot, while underwatering might cause your plants to wilt. So, how can you tell when your basil is thirsty? A simple test is to poke your finger into the soil. If it feels dry about an inch down, it’s time for a drink! Remember, basil prefers well-draining soil, so ensure your pot or garden bed allows for excess moisture to escape.

A few months ago, I observed a friend’s basil garden that was thriving. The secret? They used a drip irrigation system that provided consistent moisture without drowning the plants. Inspired, I decided to set up a similar system for my garden. The result? My basil flourished better than ever before, providing an abundant harvest for my kitchen. At the end of the day, finding the right watering technique can make all the difference in the success of your basil plants.

Pruning for Productivity

One of the most effective ways to encourage a fuller basil plant is through regular pruning. By pinching off the tops of your basil plants, you stimulate branching, leading to bushier growth. This not only increases your yield but also prevents the plant from flowering too soon, which can affect flavor. Have you ever tasted bitter basil? That’s often the result of flowering. Aim to prune your basil every few weeks, especially once it reaches about six inches tall.

I vividly remember my first attempt at pruning. I was hesitant, worrying that I might harm the plants. Instead, what I found was that after a few snips, my basil exploded with new growth, providing me with fresh leaves for weeks. The lesson here is clear: don’t be afraid to prune! Embrace it as a way to promote healthy growth and maximize your basil harvest.

Harvesting Techniques

As your basil plants flourish, it’s time to enjoy the fruits of your labor. But how you harvest can greatly influence future growth. To maintain healthy plants, always use clean, sharp scissors or garden shears to snip leaves, rather than tearing. This minimizes damage to the plant and encourages it to produce new leaves quickly. When is the best time to harvest? Early morning is ideal when the essential oils are at their peak.

I once made the mistake of harvesting my basil in the late afternoon when the heat had stressed the plants. The taste was not as vibrant as I expected. Since then, I’ve made it a habit to pick my basil early, ensuring that each leaf bursts with flavor. Also, consider harvesting from the top down, which promotes further growth. Enjoying fresh basil is rewarding, but how you harvest it can set the tone for your future meals.

Conclusion: Your Basil Journey Awaits

Growing basil like a pro is entirely within your reach. By choosing the right variety, providing optimal growing conditions, watering wisely, pruning regularly, and harvesting thoughtfully, you’ll be on your way to enjoying huge harvests. So, the question is: are you ready to embark on your basil journey? Share your experiences in the comments below! What varieties are you most excited to grow? And don’t forget to share this article with your fellow herb enthusiasts! Happy gardening!

How to Grow Fresh Herbs on Your Kitchen Windowsill

How to Grow Fresh Herbs on Your Kitchen Windowsill: A Comprehensive Guide

Imagine reaching for your favorite herbs while cooking, plucking them fresh from your windowsill. The aroma fills the air, adding that perfect touch to your dishes. Isn’t it time you transformed your kitchen into a mini-herb garden? Growing fresh herbs at home is not only rewarding but also incredibly easy. With just a little bit of effort, you can enjoy vibrant flavors every day.

Even if you have limited space, the kitchen windowsill provides an ideal environment for growing herbs. No matter where you live, whether in a bustling city or a serene countryside, this can be an enjoyable and straightforward project. So, how do you go about cultivating your own fresh herbs? Let’s explore what it takes to make your kitchen a flourishing herb haven.

Choosing the Right Herbs for Your Space

Not all herbs are created equal, especially when it comes to growing indoors. Popular options like basil, parsley, and chives thrive in window environments with adequate sunlight. But why is this so? Herbs are generally sun-loving plants, and the limited light from a window can influence their growth. Have you ever bought a bunch of herbs from the store, only to watch them wilt in a few days? Choosing the right herbs is the first step in ensuring a successful windowsill garden.

For beginners, basil is a fantastic choice. It’s forgiving and grows rapidly, making it perfect for those just starting their gardening journey. A friend of mine, who had never grown anything before, decided to start with basil. Within weeks, she was harvesting leaves to include in her pasta dishes! Imagine the satisfaction of knowing that your culinary creations are highlighted with fresh, homegrown ingredients.

Optimal Conditions for Herb Growth

Creating the right environment for your herbs is crucial. Most herbs need at least six hours of sunlight per day. Position your pots near a south-facing window for maximum exposure. If natural light is limited, consider using grow lights—these can often mimic the effects of sunlight and promote healthy growth. What’s your experience with indoor lighting? Have you ever tried using artificial lights to boost plant growth?

Additionally, proper airflow is essential. Herbs can suffer from dampness and mold if air circulation is poor. A windowsill often provides a good airflow balance, making it an ideal location. Just be sure to rotate your pots every few days. This simple act ensures all sides of the plant receive sunlight evenly, promoting a fuller and healthier growth.

Soil and Containers Matter

Choosing the right soil and containers can make a significant difference in your herb growing success. A well-draining potting mix is crucial; it prevents root rot and allows for moisture control. Look for soil that contains organic matter like compost or peat—this provides a nutrient-rich base for your herbs to thrive.

As for containers, ensure they come with drainage holes. If you’re using pots without holes, consider using pebbles at the bottom to help with drainage. I once saw a neighbor use mason jars for her herb garden, which not only looked charming but also kept the roots happy by allowing for adequate drainage. Have you ever seen unique containers that could enhance your indoor herb garden’s aesthetic?

Watering Wisely

Watering may seem straightforward, but it’s a delicate balance. Overwatering is a common mistake that can lead to unhappy plants. On the flip side, under-watering can leave them parched and stressed. The best approach is to check the moisture level regularly. Stick your finger about an inch into the soil; if it feels dry, it’s time to water. Remember, the goal is to keep the soil consistently moist but not soggy.

A friend of mine decided to try growing cilantro on her windowsill. She was overzealous and watered it daily, thinking more water meant faster growth. Unfortunately, she ended up with droopy, sad plants! After adjusting her watering routine, she was able to revive her cilantro, producing lush leaves in no time. What methods do you use to gauge how much to water your plants?

Harvesting and Enjoying Your Herbs

One of the most satisfying parts of growing your herbs is the harvest. But when is the right time to start snipping? It’s best to wait until your herbs are at least 6-8 inches tall before taking a few leaves. Always cut above a leaf node to encourage further growth. Also, remember that regular harvesting can stimulate bushier growth—you’ll find that the more you snip, the more robust your plants will become.

When you do harvest, think about how you can use your fresh herbs in your cooking. Basil can enhance a simple pasta sauce, while chives can elevate a homemade dip. A colleague of mine recently tossed fresh parsley into a salad, which brought a burst of freshness that store-bought herbs simply can’t replicate. How do you envision using your homegrown herbs in your everyday meals?

Moreover, if you find yourself with an abundance of herbs, consider drying or freezing them. This way, you can enjoy the fruits of your labor even when the growing season ends. Simply hang bundles of herbs upside down in a cool, dark place until they dry out completely. It’s a wonderful way to save your herbs for future culinary adventures!

The Joy of Gardening

At the end of the day, growing herbs on your kitchen windowsill isn’t just about having fresh ingredients; it’s about the joy and satisfaction of gardening. There’s something therapeutic about nurturing plants and watching them flourish. Whether you’re an experienced gardener or just starting, this small endeavor can spark a passion for cultivating life and sustainability.

So why wait? Grab some pots, soil, and seeds, and let your kitchen windowsill become a canvas for your culinary creativity. Your taste buds (and your friends) will thank you for the fresh flavors and beautiful greenery in your home. What herbs are you most excited to grow, and how do you plan to use them? Join the conversation and share your gardening journey!